Sevdesk
sevdesk User Documentation
This document describes how a user can create an account in Sevdesk software and use it in the MYFUNDBOX subscription product.
Overview
- Creating sevdesk Account
- Retrieving API Key
- Connecting to MYFUNDBOX
- Choose an invoice template for sevDesk
- Disabling and enabling sevdesk
- Reconnecting sevdesk
- Error when clicking save after API key entered or prefilled
Creating Sevdesk Account
Step 1: Click on Try for free.
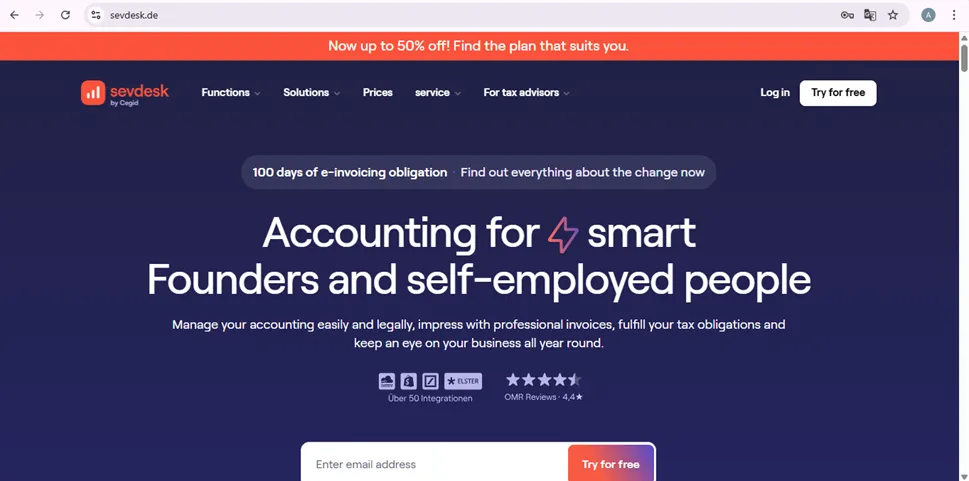
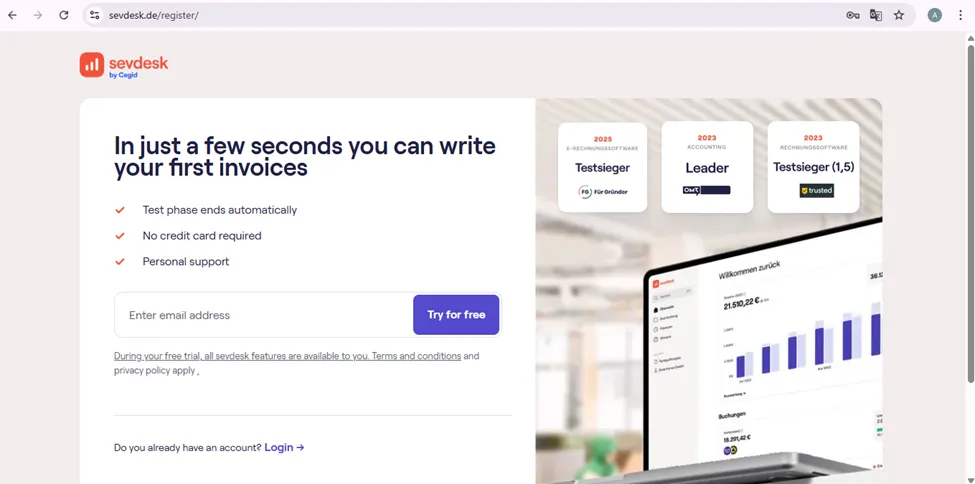
Step 2: Enter your email and click the "Try for free" button.
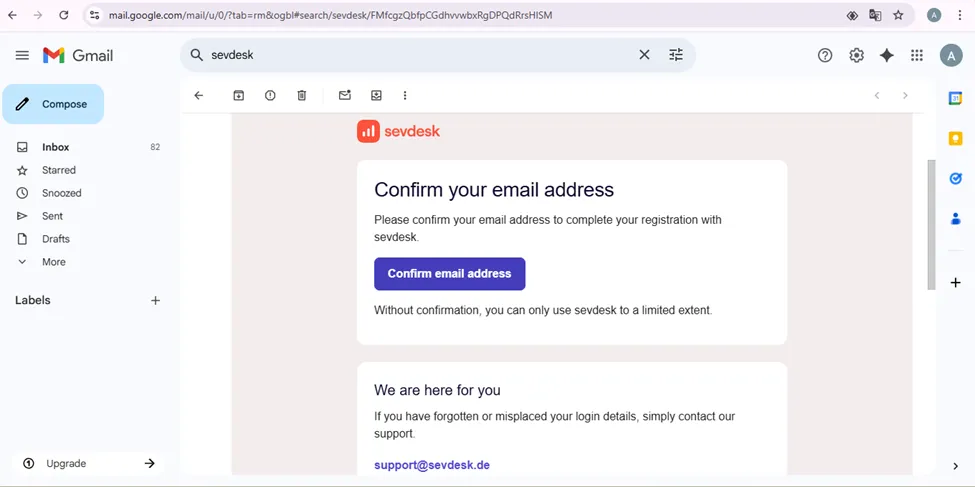
Step 3: Confirm your sevdesk account in the mail sent by sevdesk.
Retrieving API key from Sevdesk
Step 1: Log in to the Sevdesk Account.
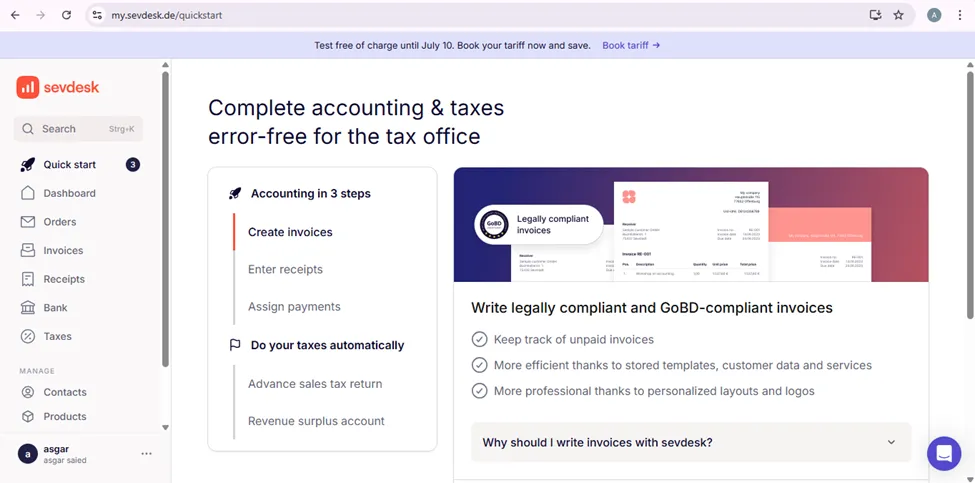
Step 2: Scroll down the options to find the Extensions section and click on integration under the Extensions section.
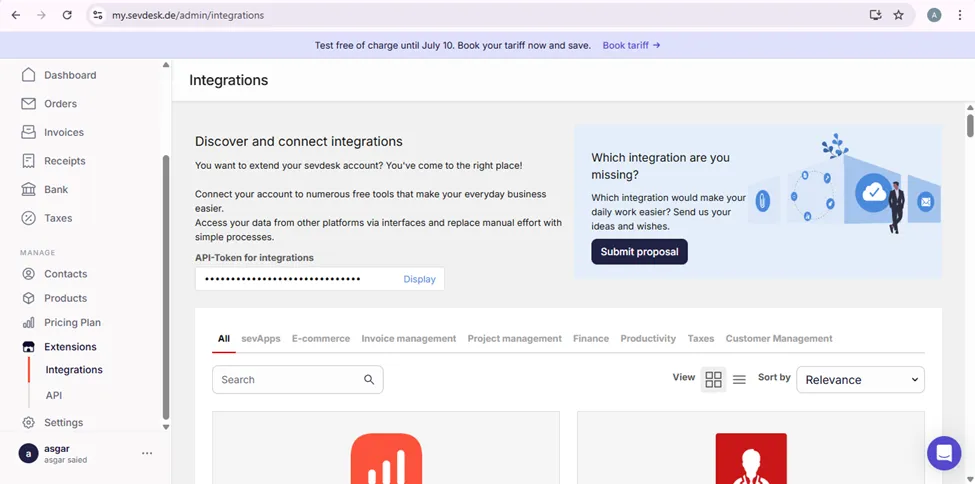
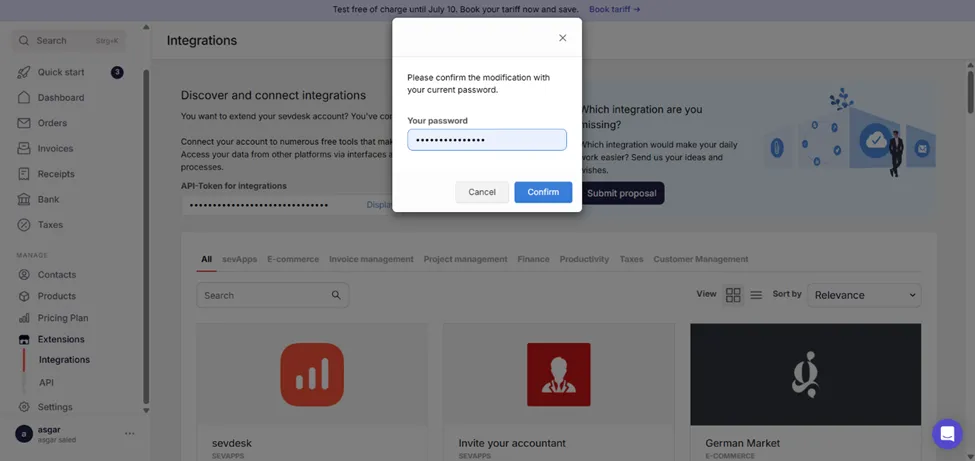
Step 3: Click on Display under API-Token for Integration and Enter the password of your Sevdesk account and click confirm.
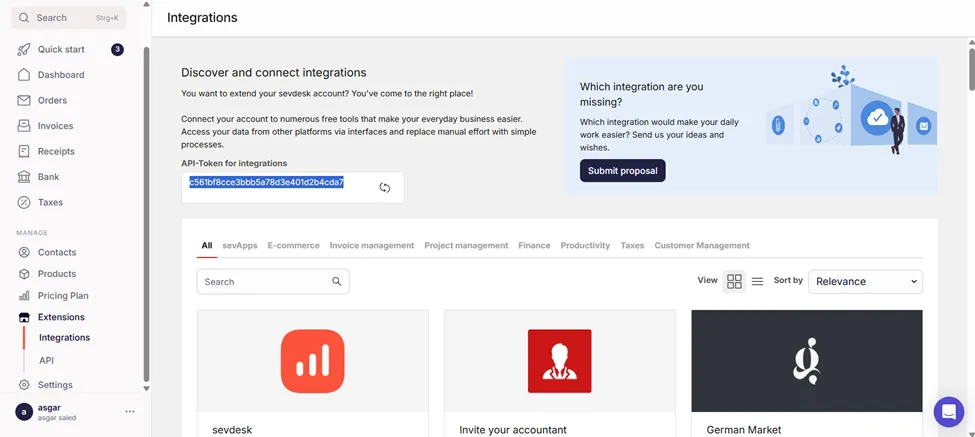
Step 4: Copy the API Token.
Connecting to MYFUNDBOX
Step 1: Open the Configuration section and click on the Integration option, where you can find Sevdesk connecting options.
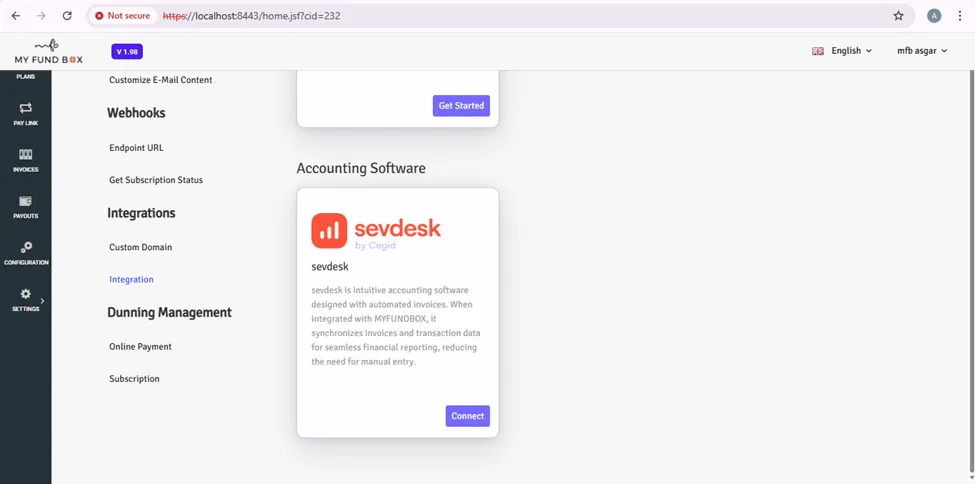
Step 2: After clicking on Get Feature, enter your copied API token from Sevdesk and click the Save button.
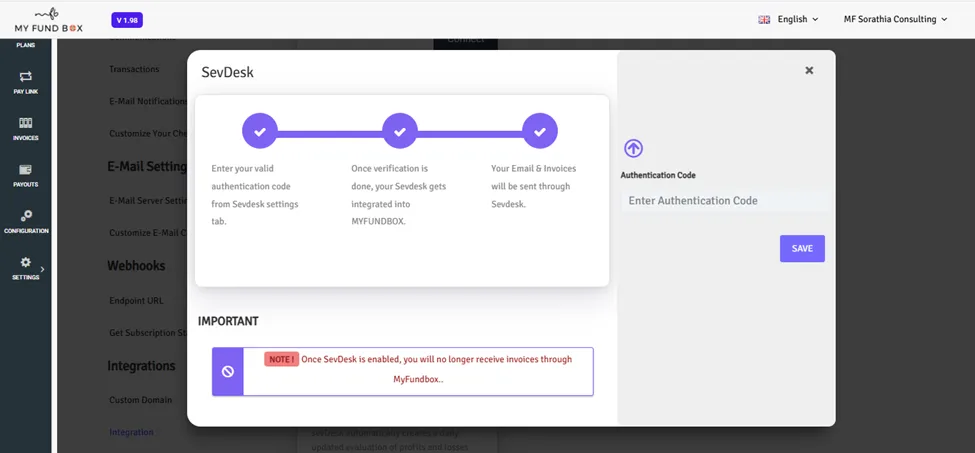
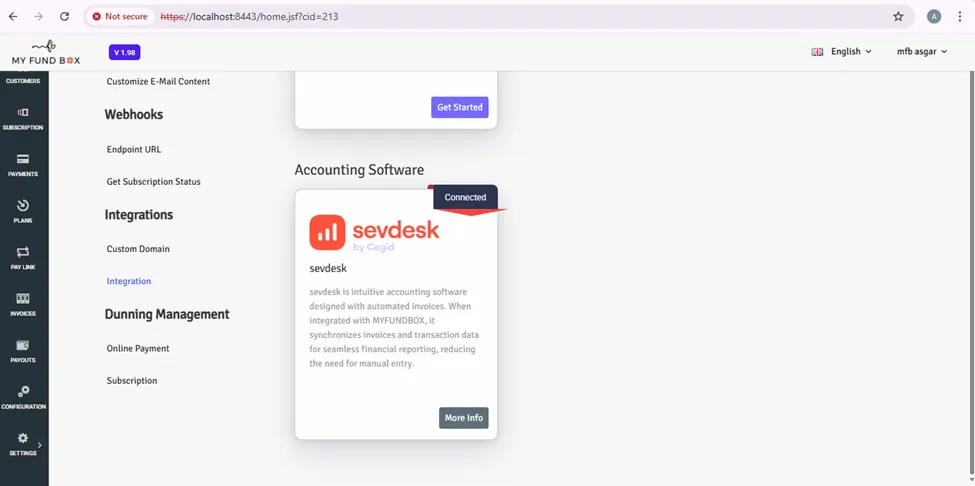
Step 3: Successfully connected Sevdesk.
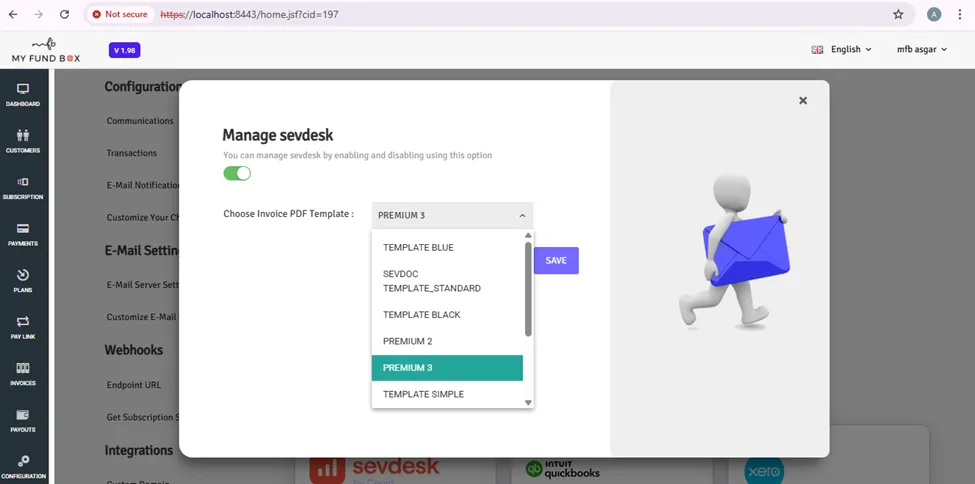
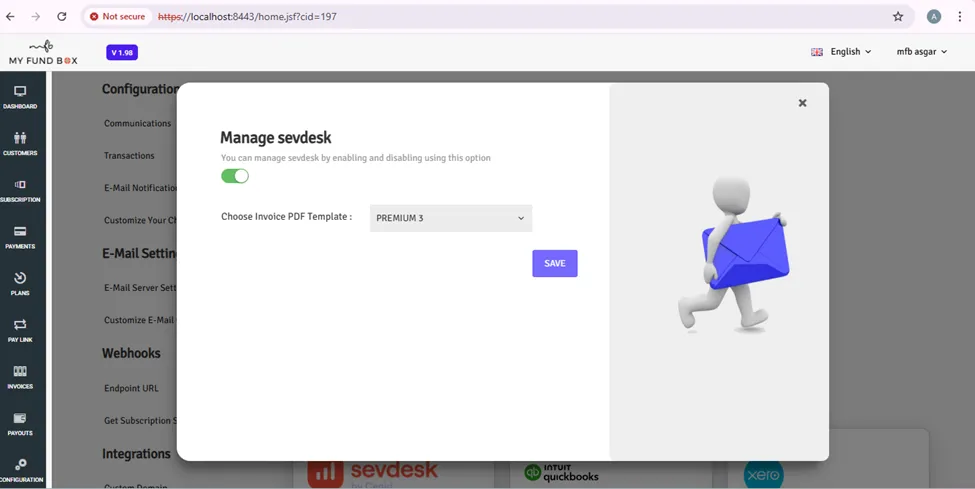
Choose Invoice Template for Sevdesk.
Step 1: Click on the dropdown, choose a template, and click the save button. This template will be used while generating an invoice from SevDesk.
Disabling and Enabling Sevdesk
Step 1: Click on the green toggle button to enable and disable Sevdesk.
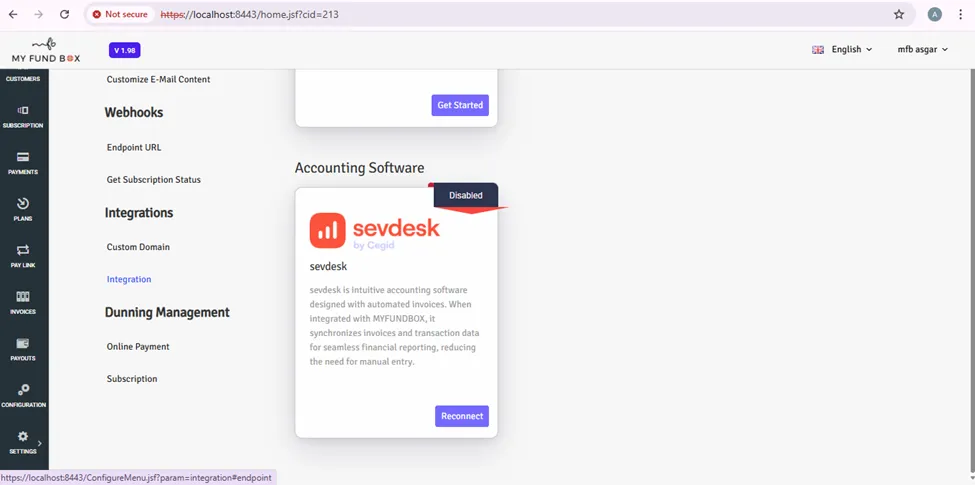
Reconnecting Sevdesk
Step 1: To reconnect to Sevdesk, click on the Reconnect button.
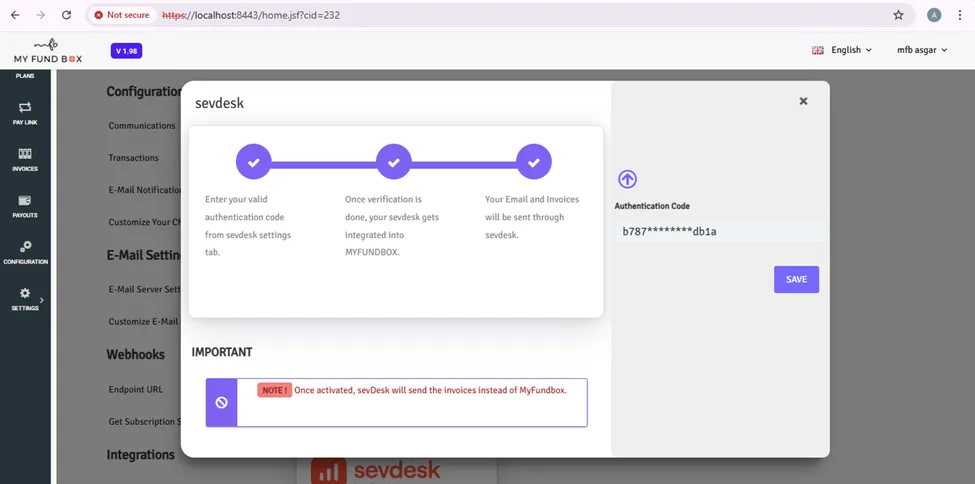
Step 2: Click the save button with the prefilled masked API key.
Error when clicking save after entering API key or with prefilled masked API key
Step 1: If it shows to enter a valid API key.
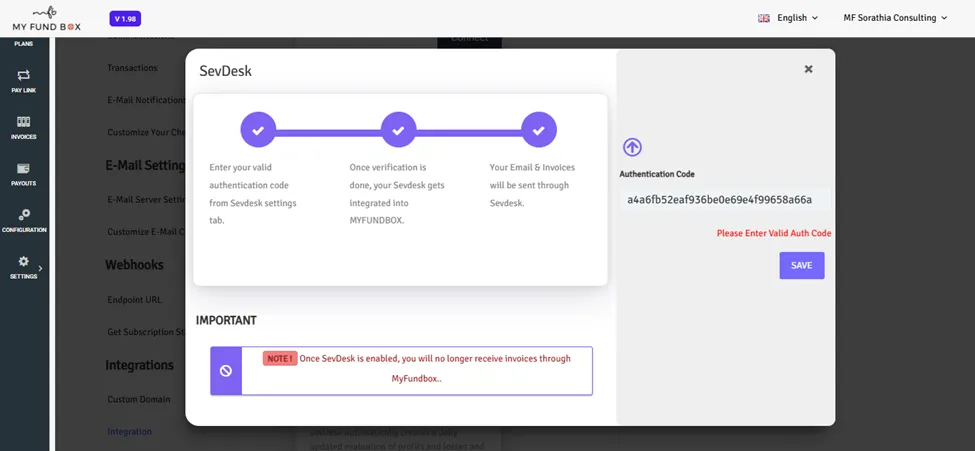
Step 2: Go to your SevDesk account and regenerate the API key in the integration module.
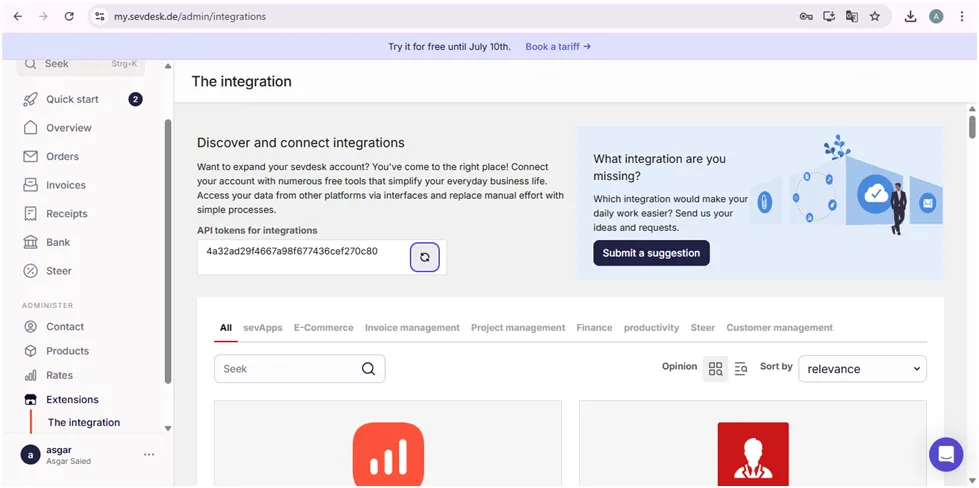
Step 3: After entering the password, copy the API key and paste in MYFUNDBOX to reconnect or connect to sevdesk.