WisoBuhl
9 min
INTRODUCTION:
This document describes how User can create an Account in WisoBuhl software and get Keys and credentials to connect to MYFUNDBOX product.
STEPS :
Step 1: Create an WisoBuhl Account
- Visit WisoBuhl
- Click Sign Up or Create an account
Step 2: If already having an account Sign In
Step 3: Get Credentials
- Go to Extensions next to the settings icon (as shown in Figure 1.0).
- Click custom extension and create extensions (as shown in Figure 1.1).
- Add the below URL (as shown in Figure 1.2 & Figure 1.3).
in this email= add your MYFUNDBOX email correctly the URL should like the above mentioned URL don’t change the URL format.
- If future you update your email in MYFUNFBOX need to update in the Above URL in WisoBuhl Extension as well it is mandatory
- And click the generate API key button. You will get the keys (as shown in Figure 1.3) collect or save the two keys for MYFUNDBOX connection.
- Then navigate below to the API access and enable the below mentioned event (as shown in Figure 1.4).
- Article: read, create, edit, delete
- Orders: read, create, PDF show
- File: create, read, edit, delete
- Customer: read, create, edit
- Delivery terms: read, create, edit
- Delivery note: read, PDF show
- Invoice: read, create, edit, PDF show
- Account details: read
- User data: read
- Payment terms: read, create, edit
Step 4: Save Extension

Figure 1.0
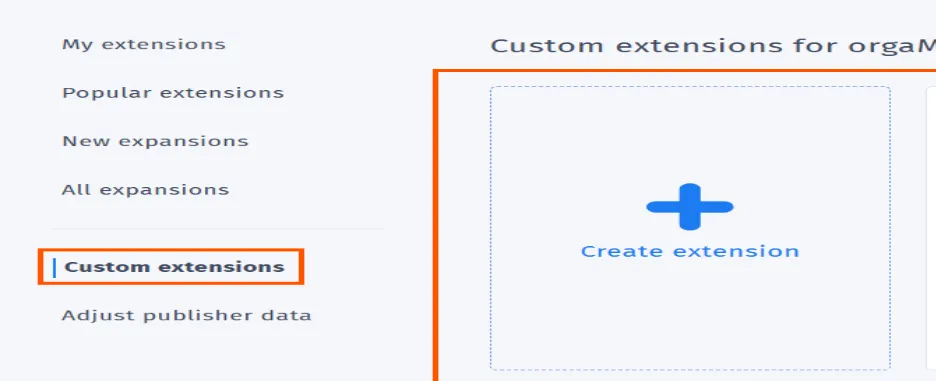
Figure 1.1
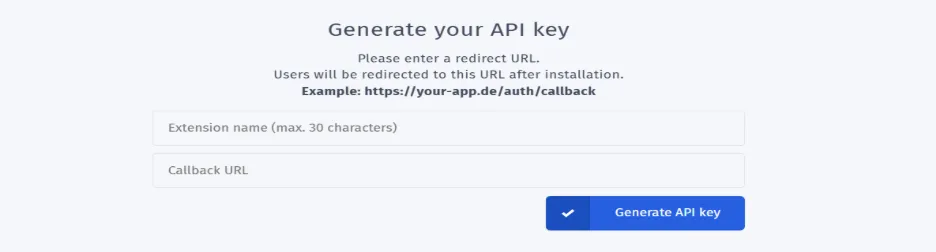
Figure 1.2
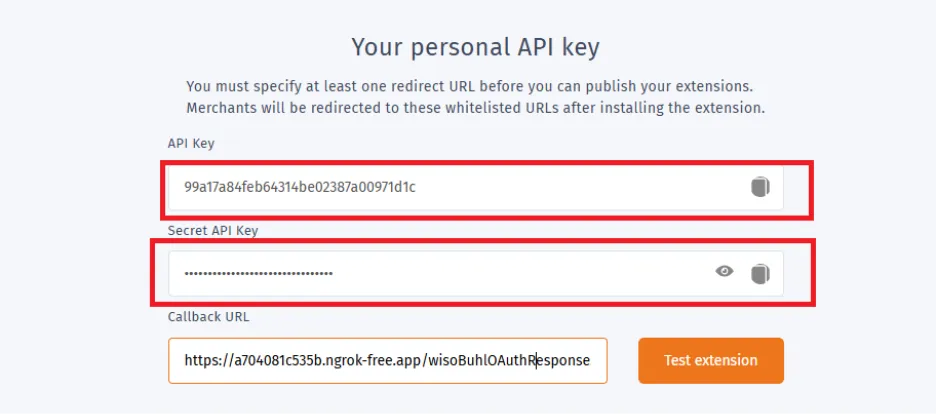
Figure 1.3
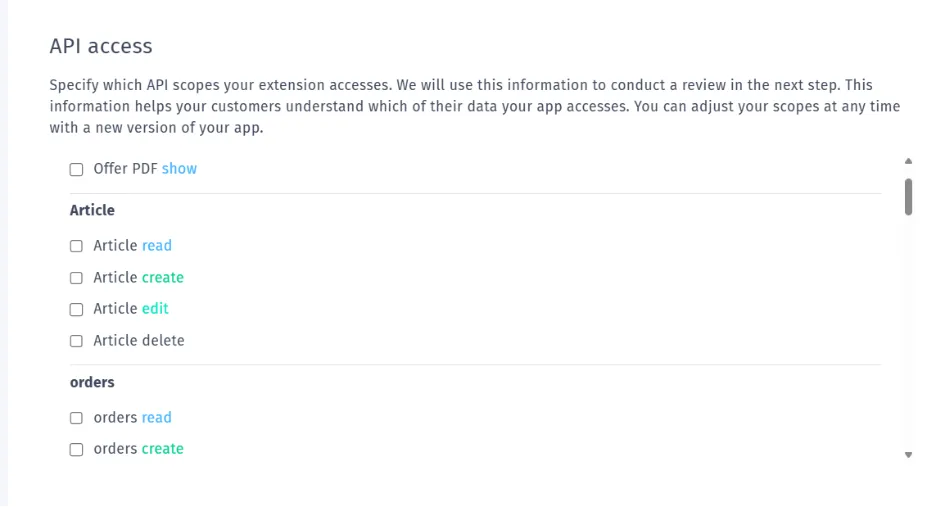
Figure 1.4
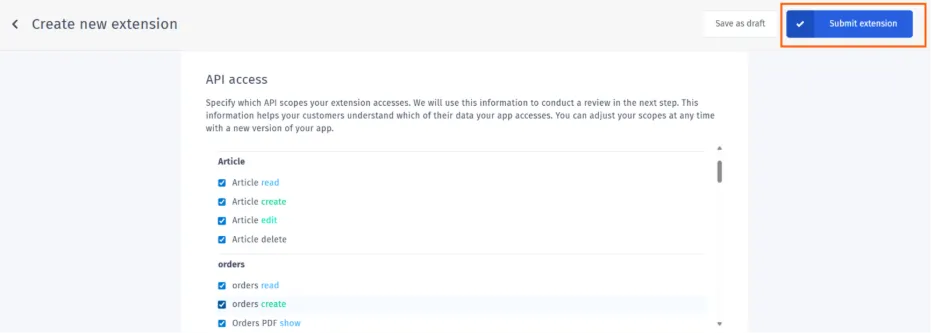
Figure 1.5
Step 5: Connect WisoBuhl in MYFUNDBOX
- Sign in to MYFUNDBOX.
- Navigate to Configuration → Integrations → WisoBuhl → click the Connect button (as shown in Figure 1.6).
- A pop-up will open. Enter the Valid Key Id and Key Secret from WisoBuhl, then click Save (as shown in Figure 1.7).
- If you enter invalid keys, you will not get connected.
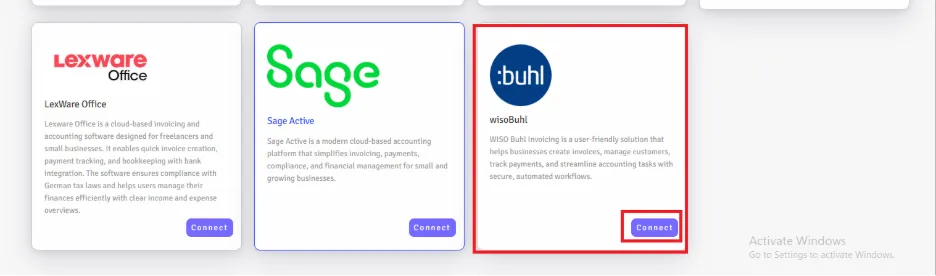
Figure 1.6
You will see a notification confirming that your WisoBuhl keys have been stored Successfully (as shown in Figure 1.8).
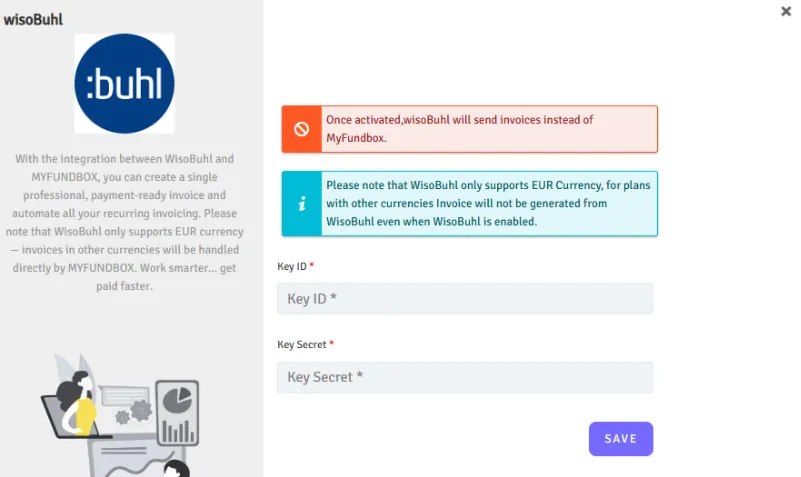
Figure 1.7

Figure 1.8
- After the successful pop-up, go to the extension you created in your WisoBuhl account. Click on that extension, and you will see your keys. Then click the Test Extension button. You will be connected to WisoBuhl in MYFUNDBOX.
- Please re-log in to your MYFUNDBOX account for the changes to take effect.
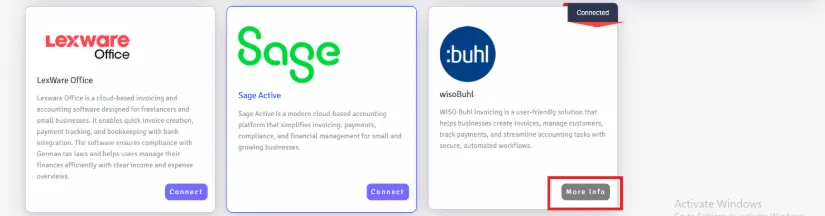
After a successful connection, you will see Connected in the WisoBuhl module in your MYFUNDBOX account (as shown in Figure 1.9).
Step 6: To Enable / Disable / Delete Connections
6.1 For Enable / Disable Connections
- In Manage WisoBuhl, you can enable or disable the WisoBuhl connection by clicking the toggle button (as shown in Figure 1.10). by clicking more info button (as shown in Figure 1.9).
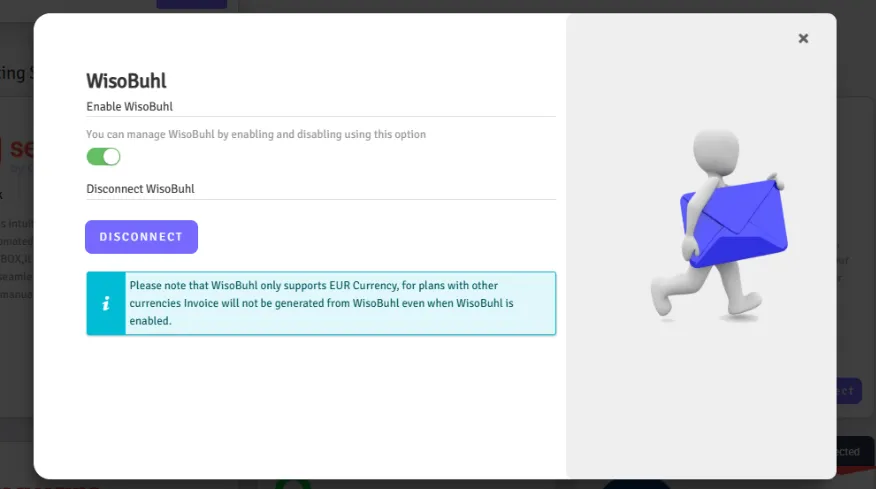
- This only enables or disables the connection; it does not fully disconnect it
6.2 For Delete Connections
- If you want to delete or disconnect the WisoBuhl account, click the Delete button and then click Yes, delete it (as shown in Figure 1.10).
- Your connection will be revoked.
- If you disconnect the connection, you will lose all WisoBuhl connection credentials from MYFUNDBOX.
- To reconnect, you will need to follow the process starting from Step 4.
Limitations
- Since WisoBuhl does not support webhooks, it is not possible to sync bank transfer status updates. As a result, even if an invoice is marked as paid in WisoBuhl, it will continue to show a pending status in MYFUNDBOX.