Quickbooks
10 min
QUICKBOOKS
INTRODUCTION:
This document describes how a user can create an account in QuickBooks software and get keys and credentials to connect to the MYFUNDBOX product.
STEPS:
Step 1: Create an Intuit Developer Account
- Visit Intuit Developer.
- Click Sign Up or Create an account.
Step 2: If you already have an account, sign in.
Step 3: Add the Redirect URIs in your settings.
- Click the workspace you have (as shown in the figure Fig. 1.0).
- Navigate to Settings → Redirect URIs → Production, then add the following URIs and click Save (as shown in Figure 1.1):
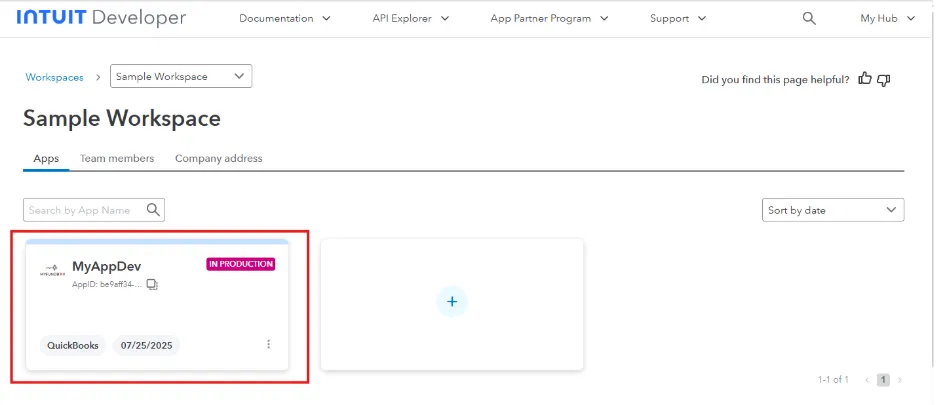
Fig 1.0
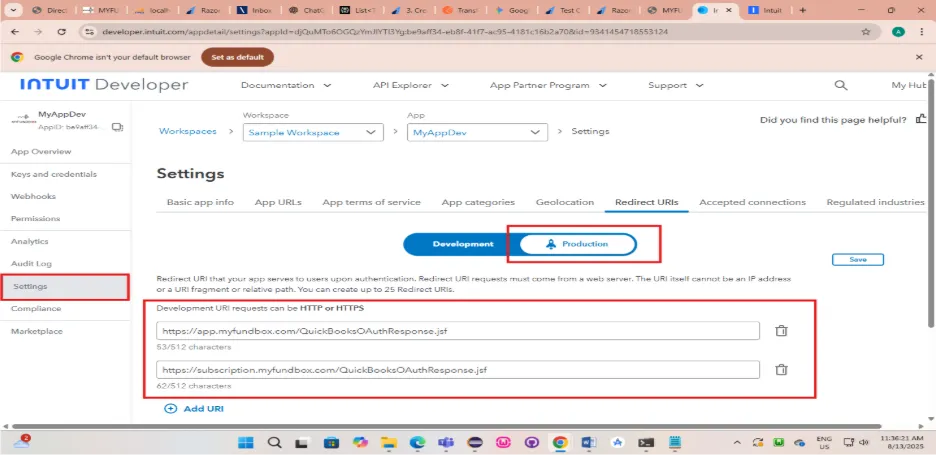
Fig 1.1
Step 4: Collect Keys & Credentials (Client ID & Client Secret)
- Navigate to Keys & Credentials (as shown in Figure 1.2).
- Click Production → Show Credentials, then copy the Client ID and Client Secret (as shown in Figure 1.2).
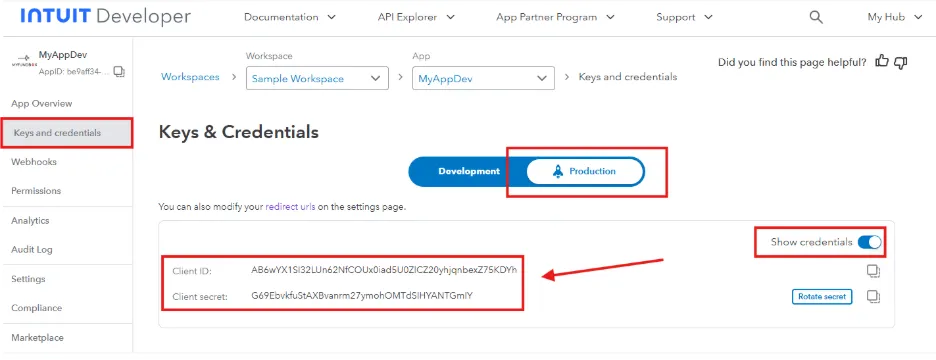
Fig. 1.2
Step 5: Connect QuickBooks in MYFUNDBOX
- Sign in to MYFUNDBOX.
- Navigate to Configuration → Integrations → click the Get Feature button (as shown in Figure 1.3).
- A pop-up will open. Enter the Client ID and Client Secret, then click Save (as shown in Figure 1.4).
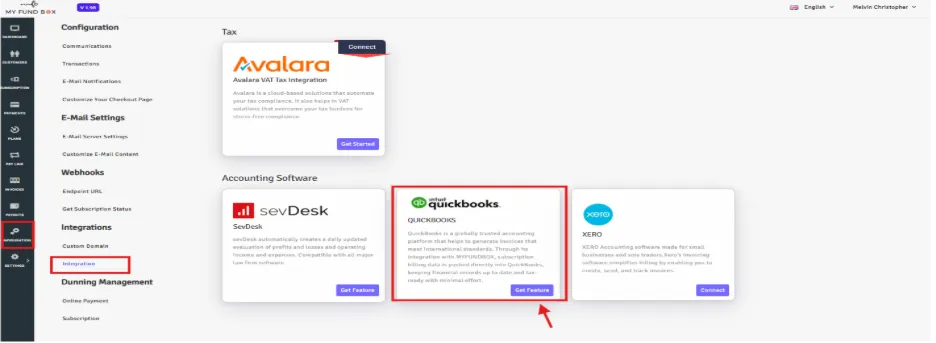
Fig 1.3
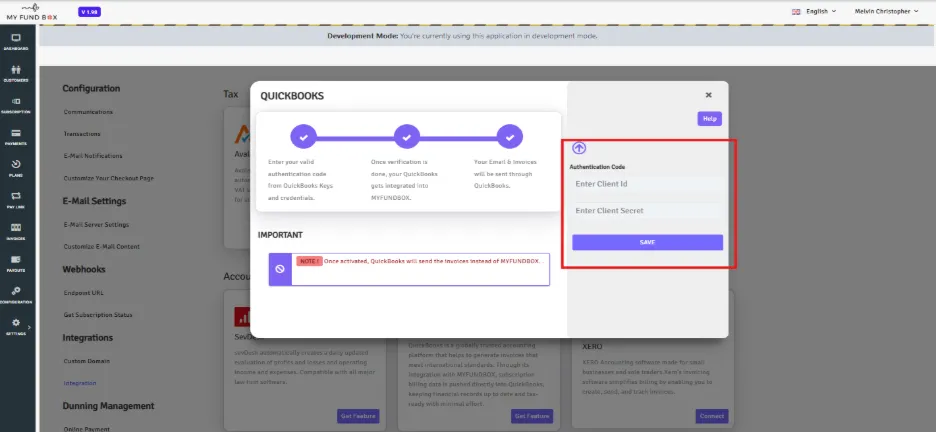
Fig. 1.4
- You will be redirected to QuickBooks to connect your account (as shown in Figure 1.6).
- Click Connect to establish the connection.
- After a successful connection, you will see Connected in the QuickBooks module of your MYFUNDBOX account (as shown in Figure 1.7).
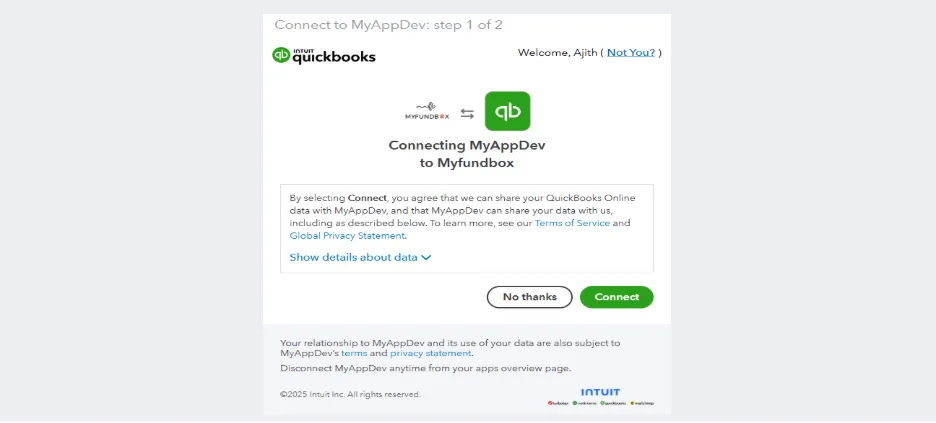
Fig 1.6
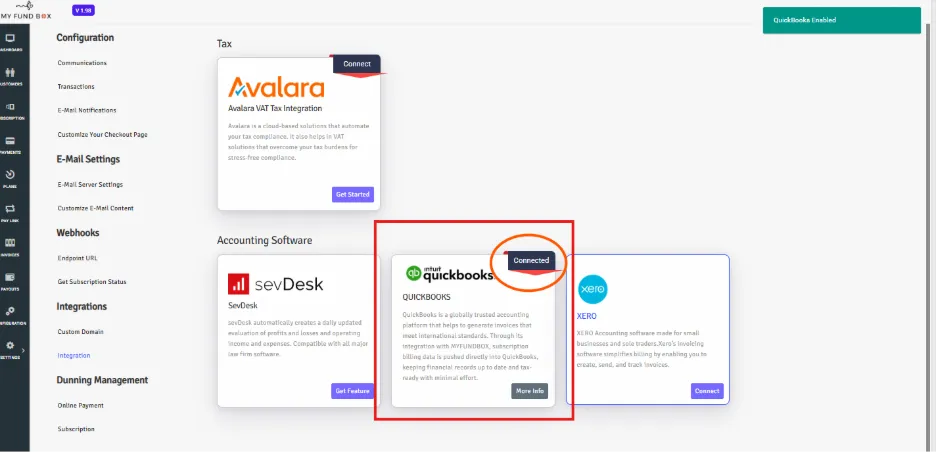
Fig. 1.7
Step 6: To Enable/Disable/Delete Connections
6.1 For Enable/Disable Connections
- In Manage QuickBooks, you can enable or disable the QuickBooks connection by clicking the toggle button (as shown in Figure 1.8).
- This only enables or disables the connection; it does not fully disconnect it
6.2 For Delete Connections
- If you want to delete or disconnect the QuickBooks account, click the Delete button and then click Yes, delete it (as shown in Figure 1.8).
- Your connection will be revoked.
- If you disconnect the connection, you will lose all QuickBooks connection credentials from MYFUNDBOX.
- To reconnect, you will need to follow the process starting from Step 5.
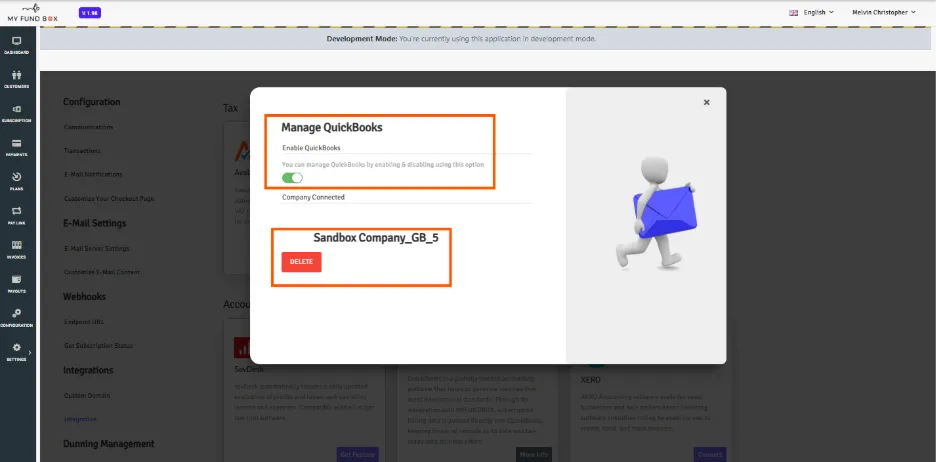
Fig 1.8
Step 7: Mandate to update In QuickBooks Account After Connection:
- After connecting, it is mandatory to disable the custom transaction number in your QuickBooks account (as shown in Figures 1.9 and 1.10).
- Click the Settings icon in the top right corner.
- Click Account and Settings.
- In the left tab, navigate to Sales.
- Click Custom fields, disable Custom transaction numbers, and save the changes.
- After saving, click Done.
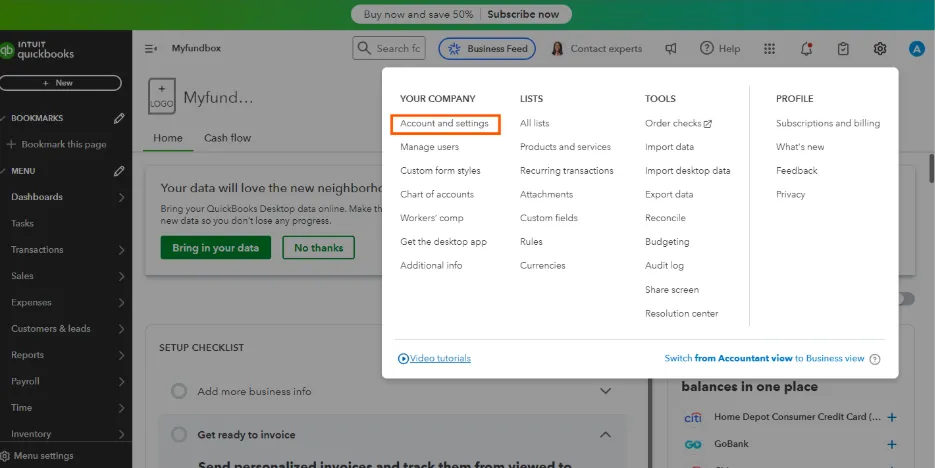
Fig 1.9
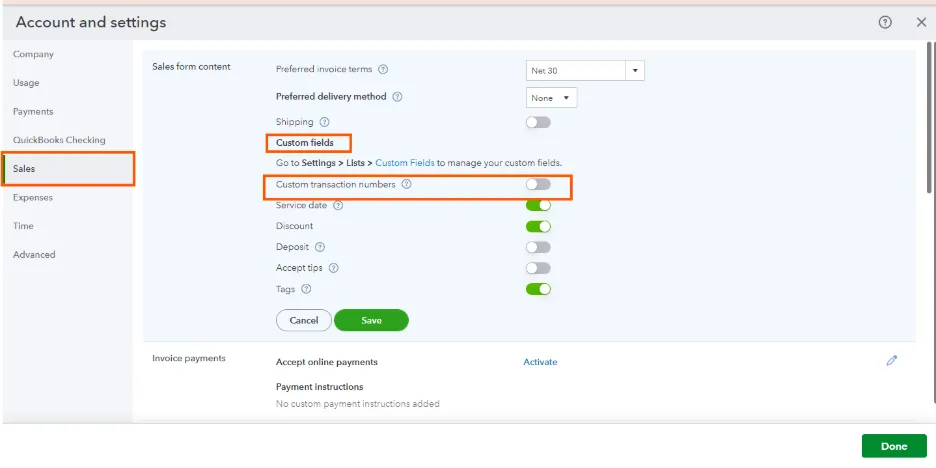
Fig 1.10