ZOHO SALES CRM
26 min
INTRODUCTION:
This document provides an overview of the integration between Zoho CRM and the connected billing system, enabling secure and automated synchronization of customer, deal, and subscription data through APIs to reduce manual effort, improve data accuracy, and streamline overall sales and billing operations.
Step 1: Create an Zoho Sales Crm Developer Account
- Visit Zoho Sales CRM.
- Click Sign Up or Create an account
Step 2: If already having an account, sign in.
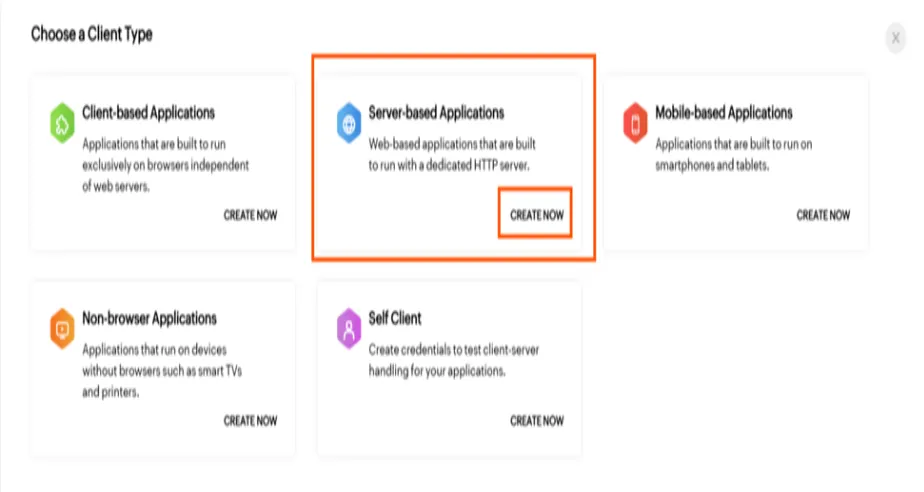
Step 3: Add client and create Server-based application.
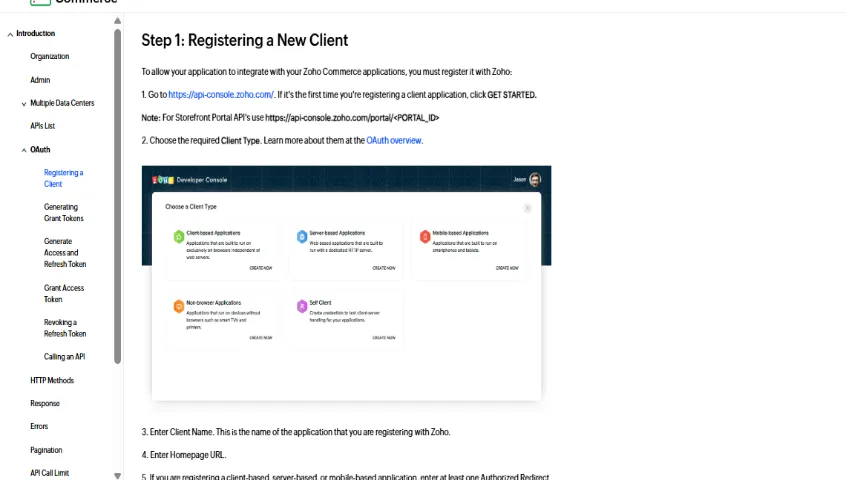
- Visit Zoho Api Console and Click Sign Up or Create an accout.
- Click the "create now" button
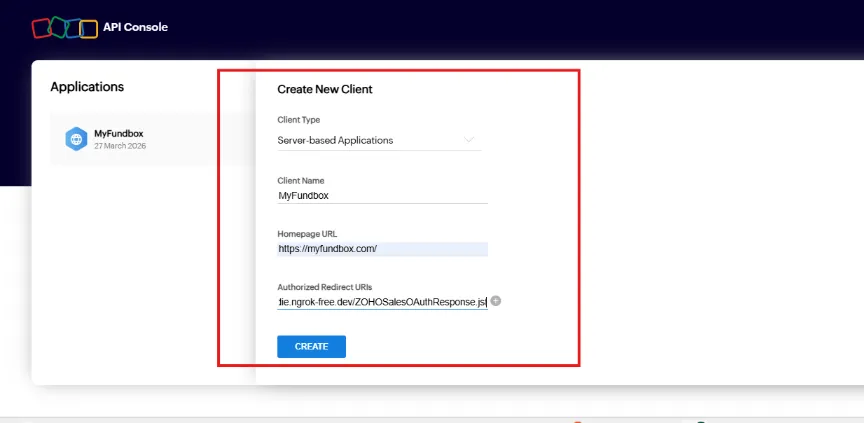
Step 4: Fill in the necessary details and add the Redirect URIs.
- Fill in the necessary details and navigate to Redirect URIs, then add the following URIs and click create. HomePage Url -https://myfundbox.com/
Redirect Url:
https://app.myfundbox.com/ZOHOSalesOAuthResponse.jsf
Step 5: Enable Toggle in Settings (Mandatory)
- Enable the toggle for the Data center to achieve connection; it is mandated. Use the .com domain for the initial OAuth authorization.
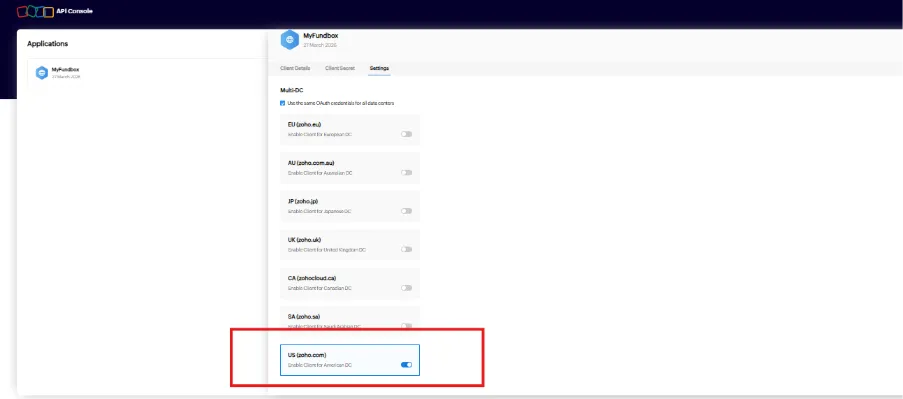
- Some regional data centers may not be available during this initial setup, as the connection starts with the .com domain. After the connection is established, the correct regional data center will be automatically determined, and all subsequent API calls will use the appropriate regional domain based on the user’s region.
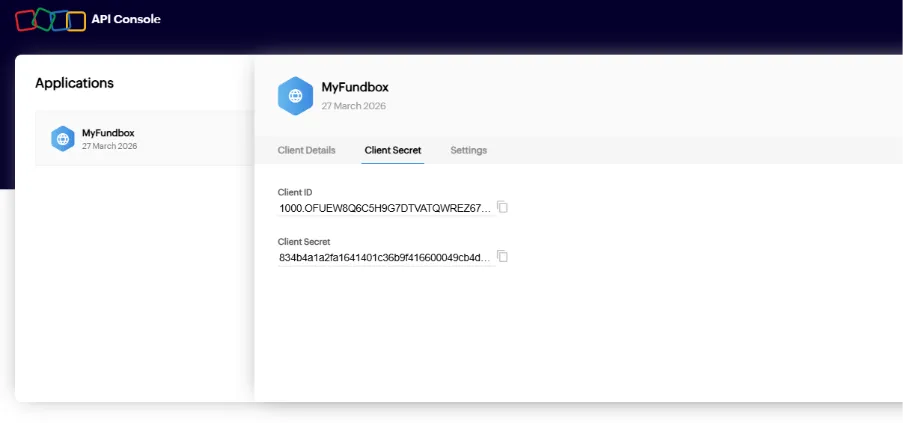
Step 6: Collect Keys & Credentials (Client ID & Client Secret)
- Navigate to Client Secret next to the Client Details copy those keys.
Step 7. Select Home Currency
- Go to Setup > General > Company Settings.
- In the Company Settings page, go to the Currencies tab.
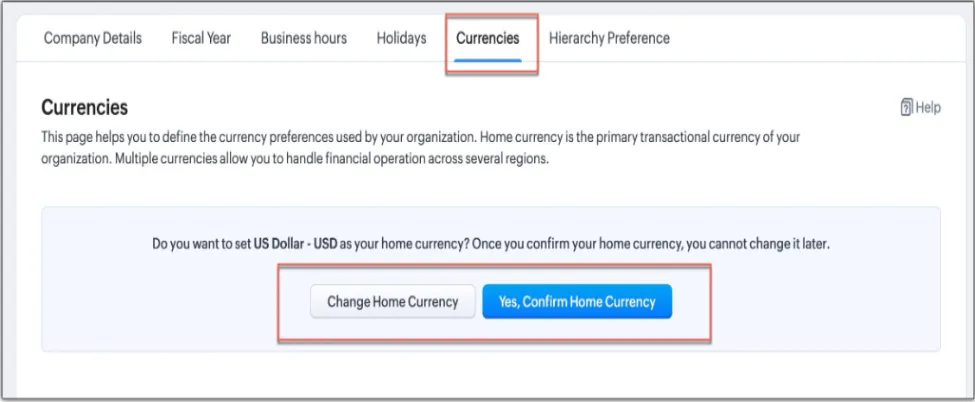
- The Base Currency is defined at the organization level in the system.
- Once the Base Currency is set, it will be applied to all products created within the organization.
- Currency cannot be changed at the individual product level.
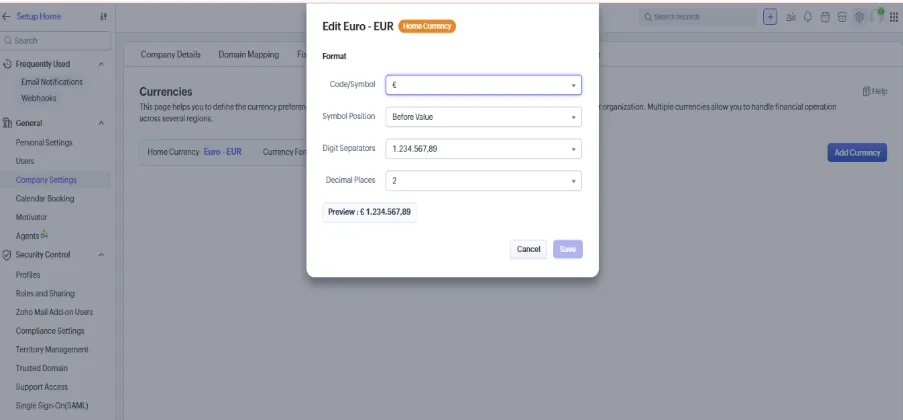
- Need to have the currency format as Currency Code for Proper Synchronization.
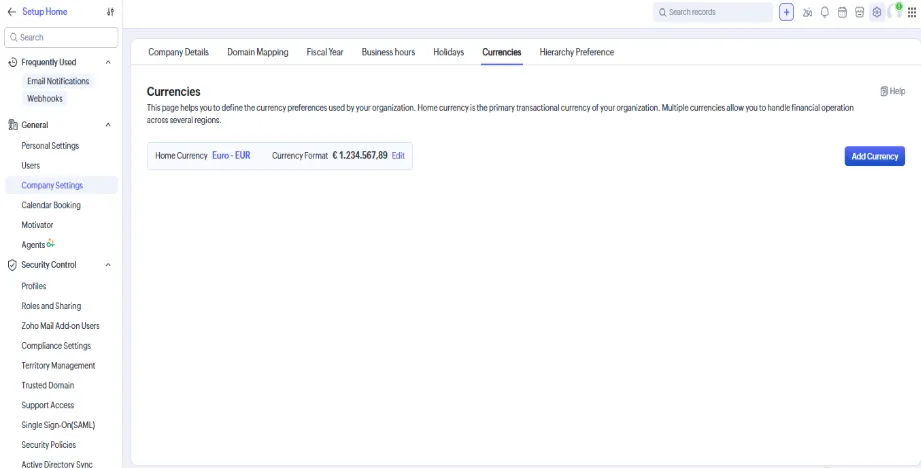
Step 8: Connect to MYFUNDBOX
- Log into your MYFUNDBOX account
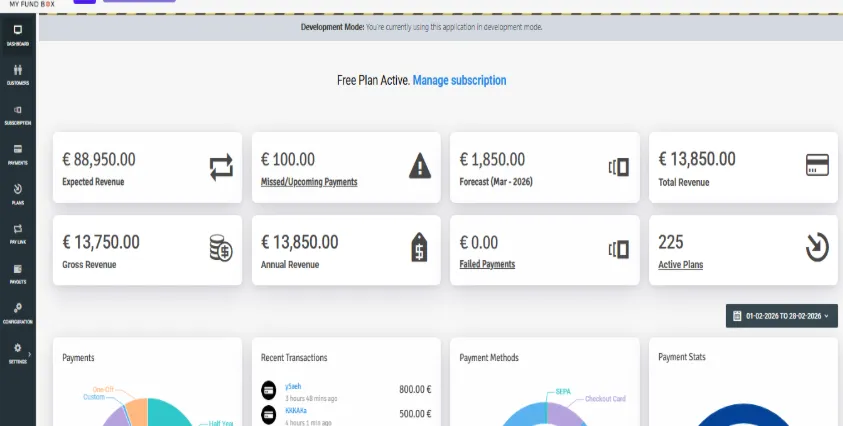
- Go to: Configuration → Integration
- You can see Zoho Sales crm integration on Sales Marketing.
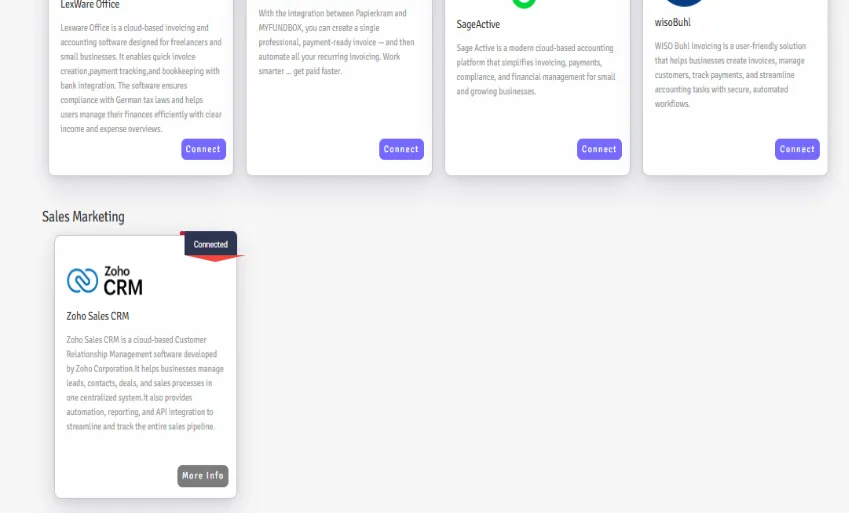
- Click the Zoho Sales crm connect button
- A pop-up will open. Enter the Client ID and Client Secret, then click Save
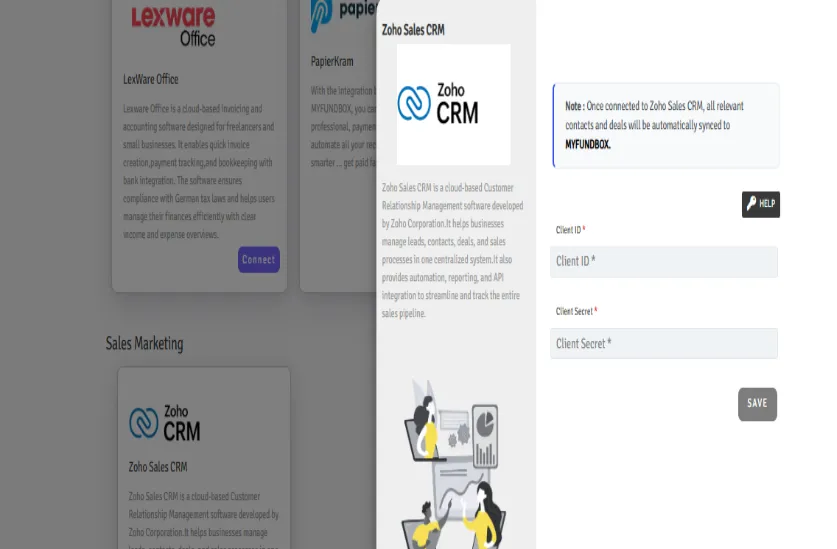
- You will be redirected to Zoho Sales to connect your account.
- Click the allow access toggle and click accept button to establish the connection
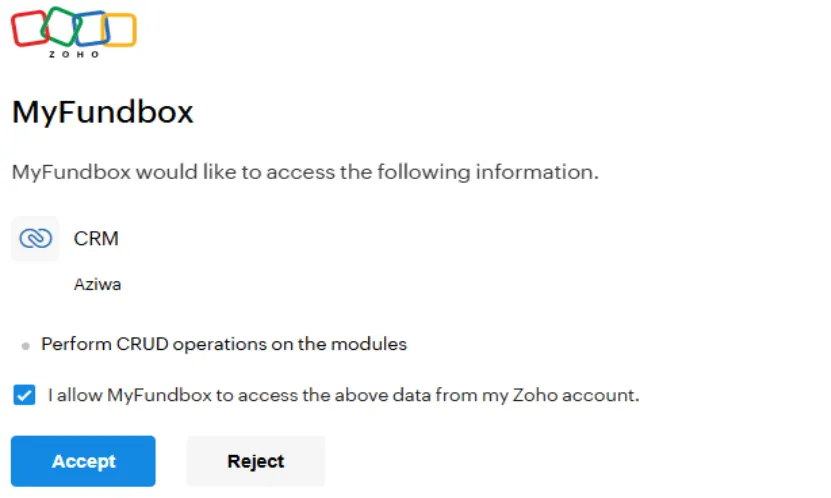
- After a successful connection, you will see Connected in the Zoho Sales module of your MYFUNDBOX account
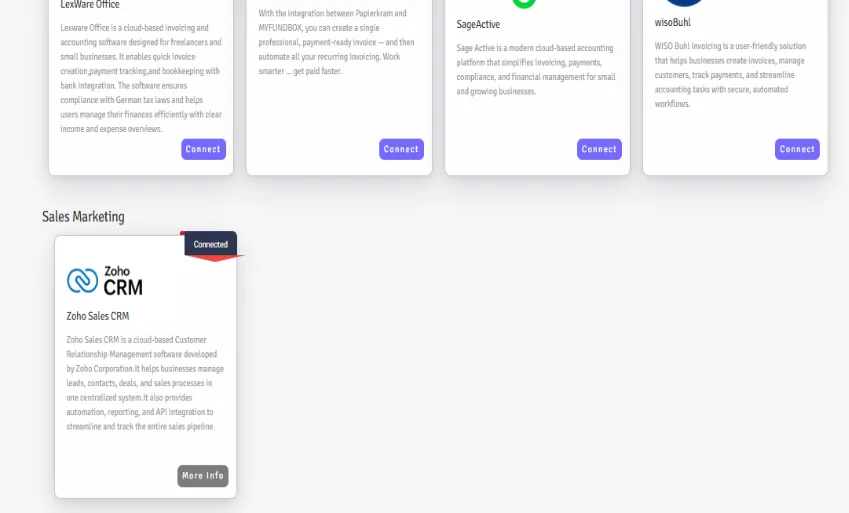
Step 9: Dashboard - Two Tabs After Connection:
9.1 Keys
- Shows: ●●●●●●●●●●●●●●●●●●●● (your hidden Client Id and Client Secret)
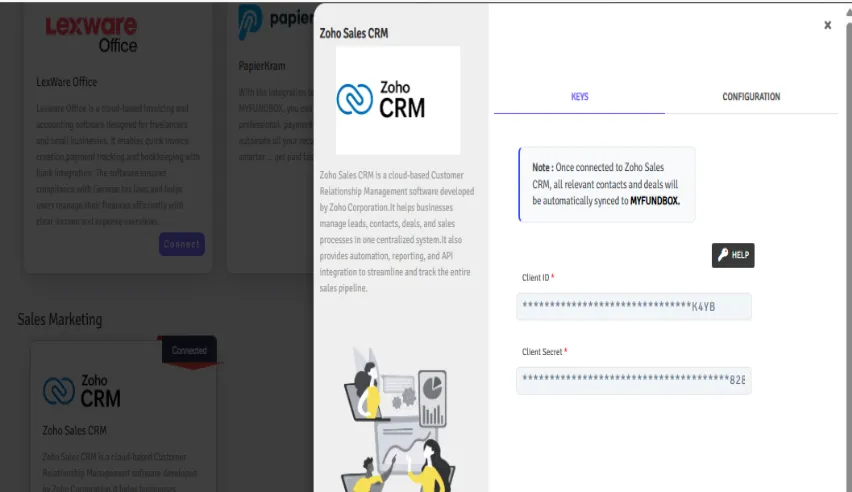
- Help button: Links to Zoho Sales CRM guides to how to get client id & secret.
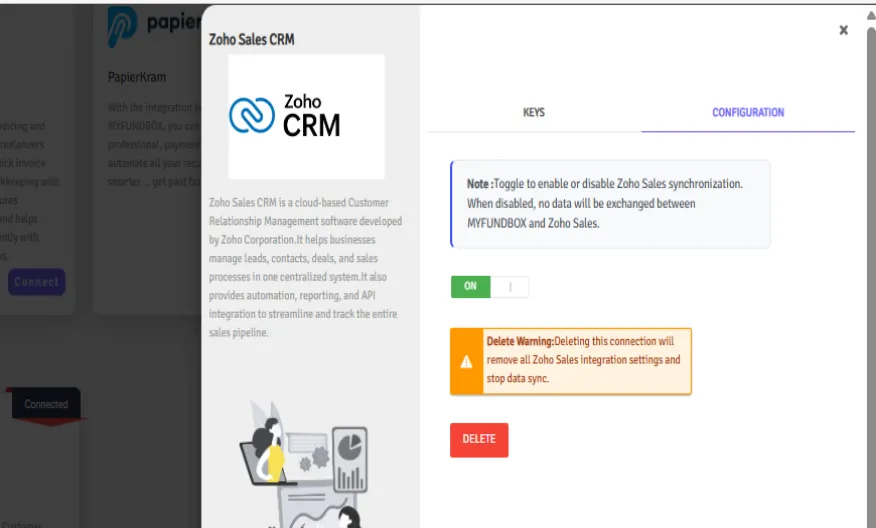
9.2: CONFIGURATION
ON/OFF Switch:
- GREEN (ON) = Zoho Sales CRM will be enabled.
- BLACK (OFF) = = Zoho Sales CRM will be disabled.
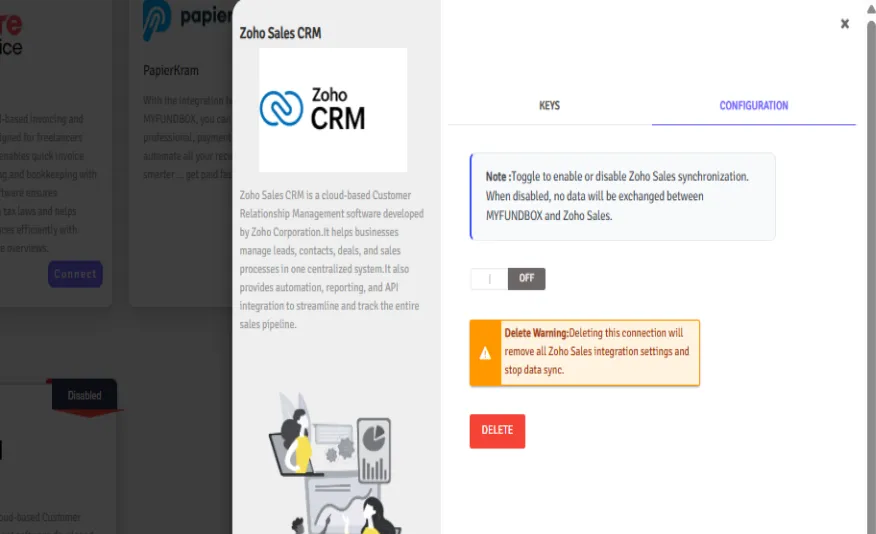
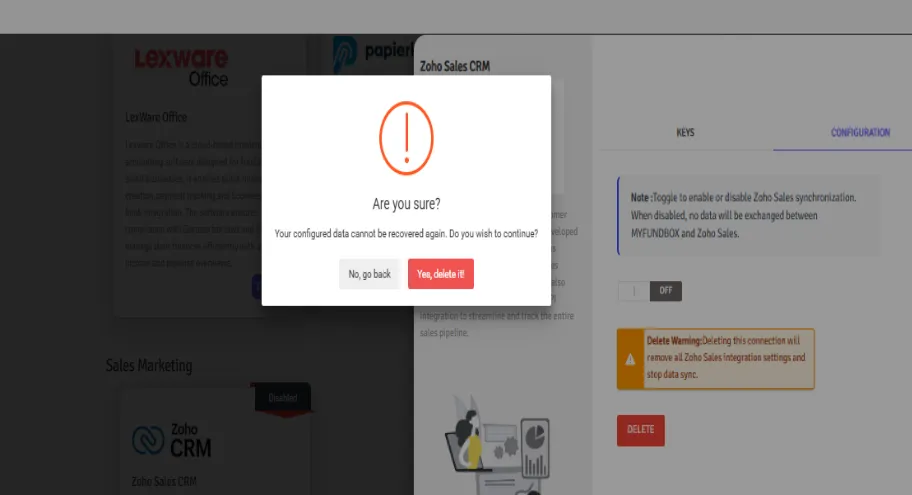
DELETE BUTTON
- Confirmation popup appears first
- Removes the connection completely
Step 10: Add Deal on the Zoho Sales CRM
10.1 Create Contacts on Zoho Sales CRM
- Create contact on zoho sales crm by clicking create contact.
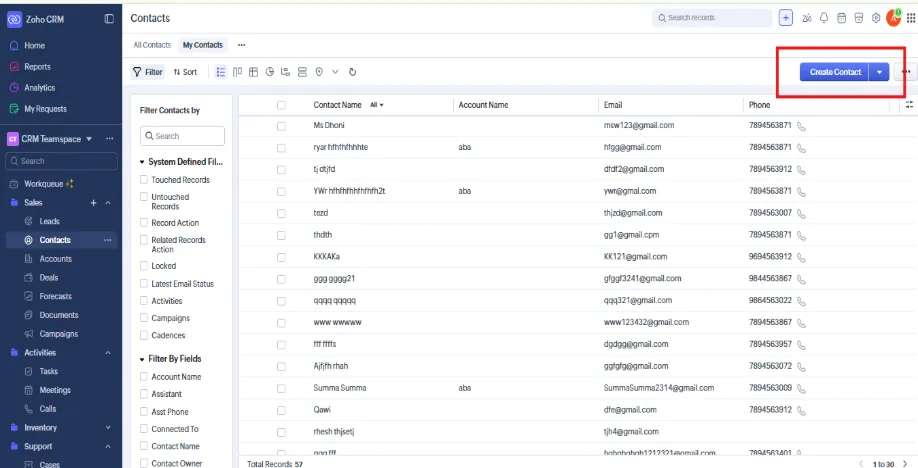
- Fill all the necessary details when creating contact.
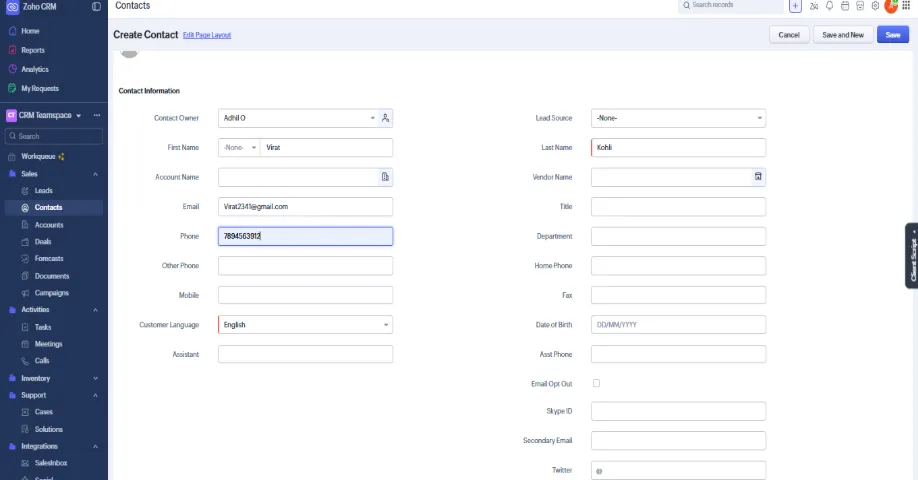
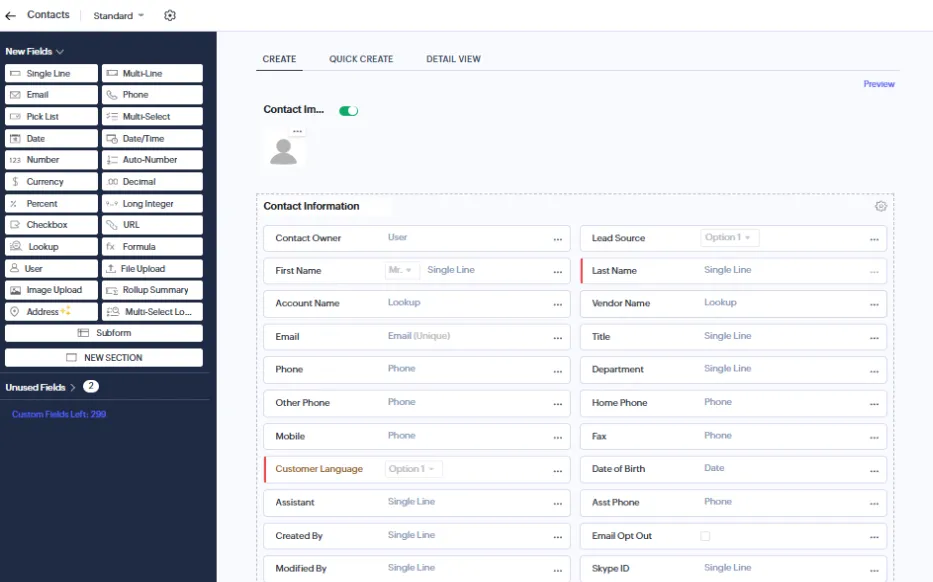
- Here some of the fields have to be manually added by clicking the edit page layout button on top.
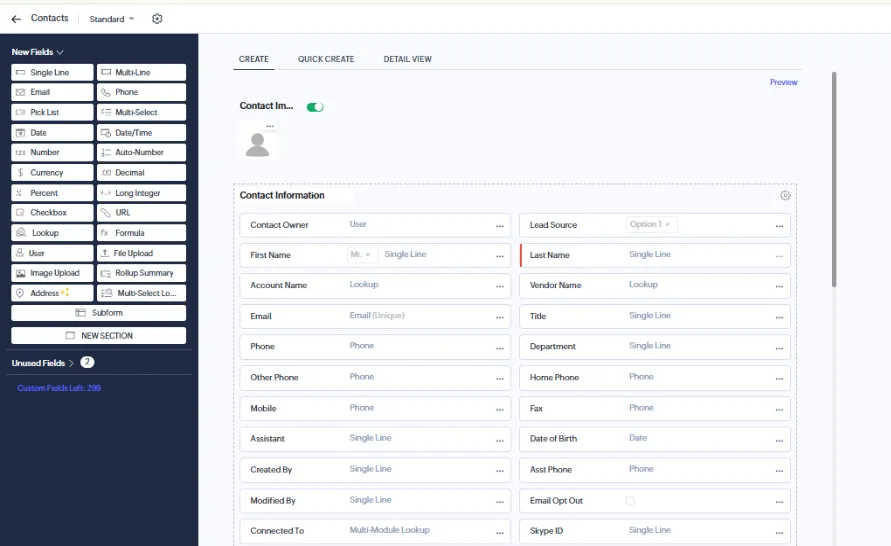
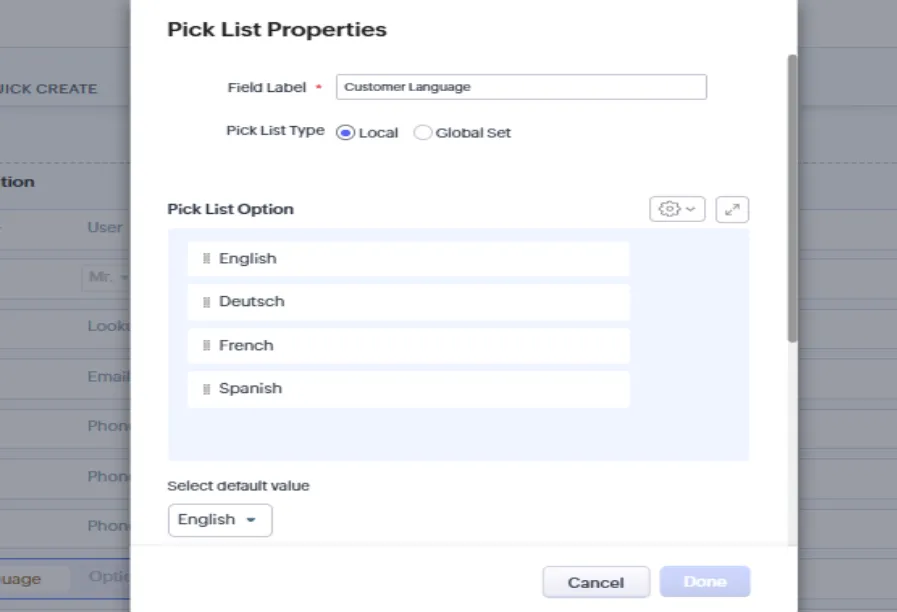
- The Customer Language field(Mandatory) is available as a picklist (dropdown menu).
- The following language options must be added in the picklist: English, Deutsch, French, Spaish.
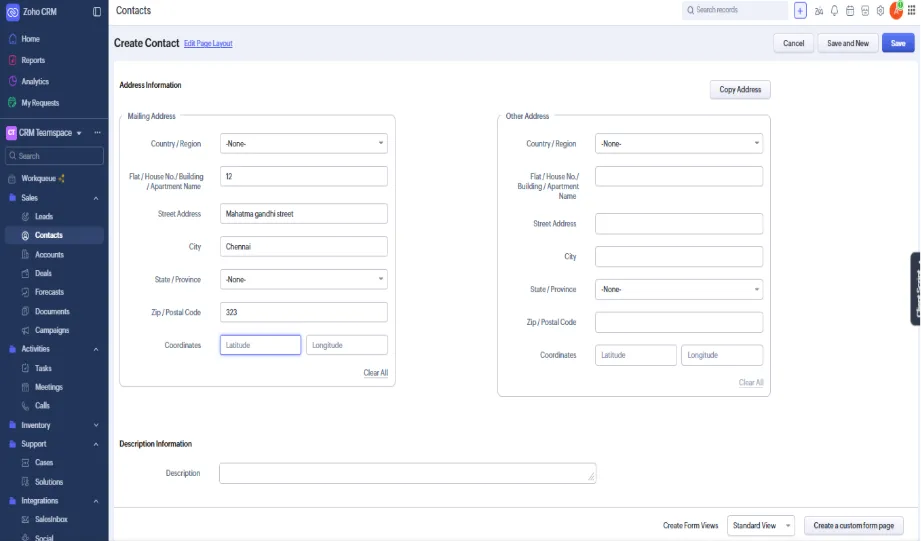
- Fill Address details
10.2 Create Products on Zoho Sales CRM
- Create product on zoho sales crm by clicking create product.
- Fill all necessary details for product information.
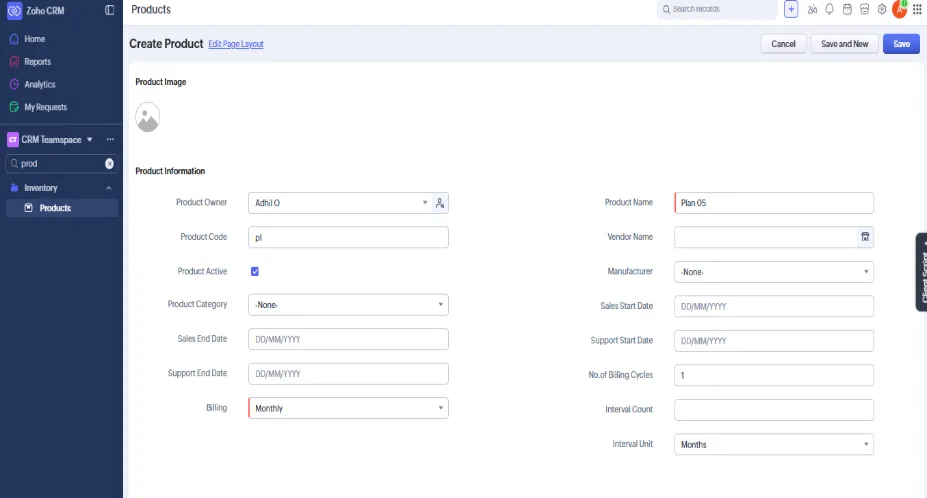
While creating or editing a Product, the following billing-related fields and tax region must be configured:
- Billing → Defines whether the product is a one-time payment or recurring subscription. Available options: Monthly, One-Off, Annual, Quarterly, Half Yearly, Daily, Weekly, Custom.If custom is selected then interval count and interval unit will be used otherwise it will not use that and all other options was linked with billing cycle and No.of Billing Cycles.
- Billing Cycle → Specifies the total duration for which the subscription will run.
- No. of Billing Cycles → Determines how many times the customer will be billed.
- Interval Count → Defines the frequency of billing within the selected interval unit
- Interval Unit → Specifies the time unit for recurring billing. Available options: Days, Weeks, Months, Years.
- Region → When on Price information using tax region was not available as default.So it has to be added manually.
- Billing Cycle → Specifies the total duration for which the subscription will run.
- No. of Billing Cycles → Determines how many times the customer will be billed.
- Interval Count → Defines the frequency of billing within the selected interval unit
- Interval Unit → Specifies the time unit for recurring billing. Available options: Days, Weeks, Months, Years.
- Region → When on Price information using tax region was not available as default.So it has to be added manually.
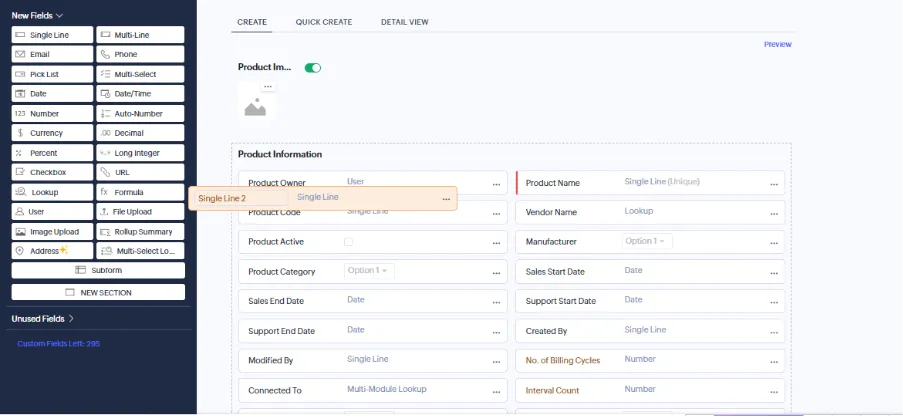
- On new field we have to drag the following configuration properties.
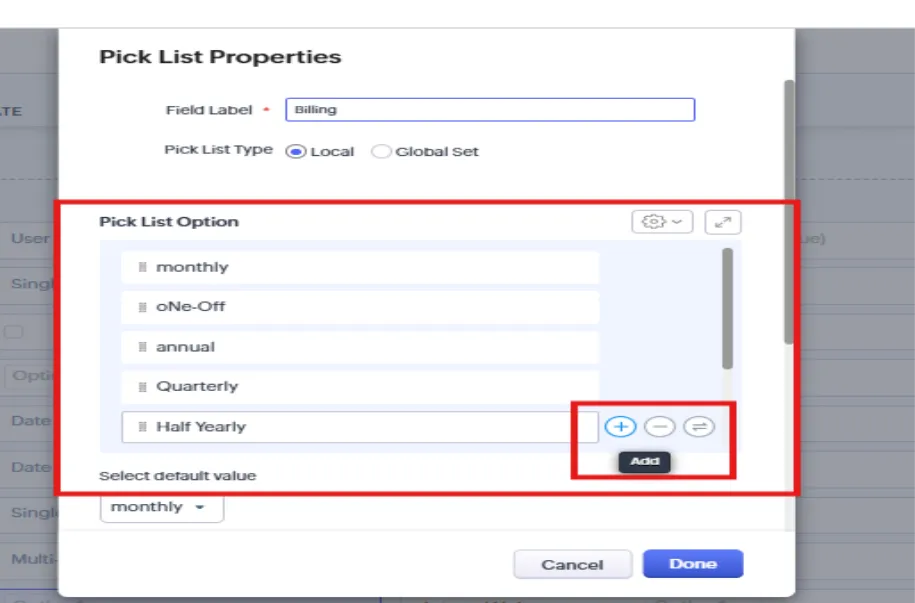
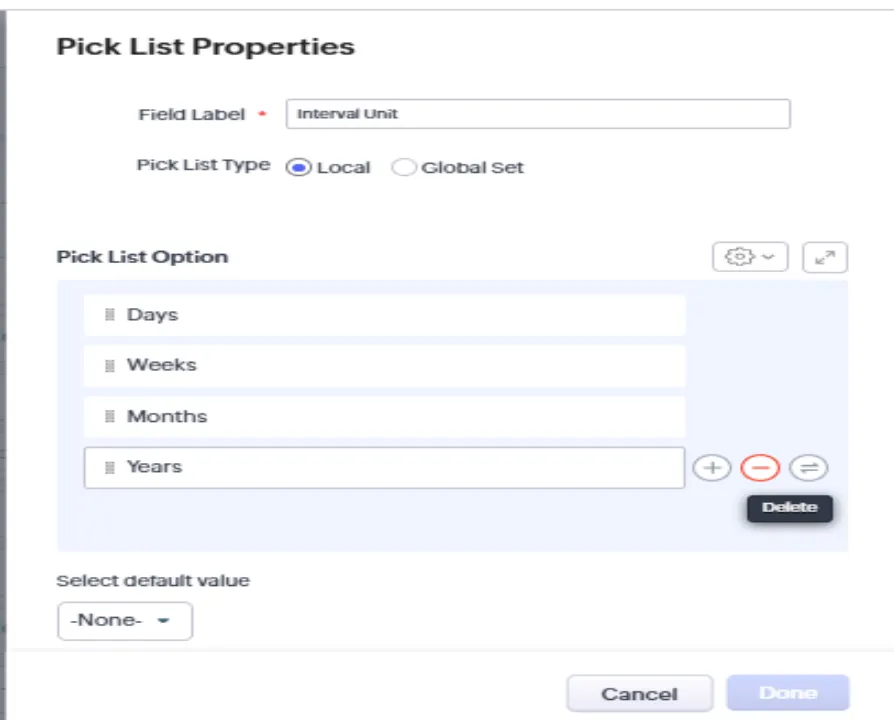
- For customizing tax rates on product edit page by clicking 3 dots on Tax by clicking customizing tax rates you can customize.
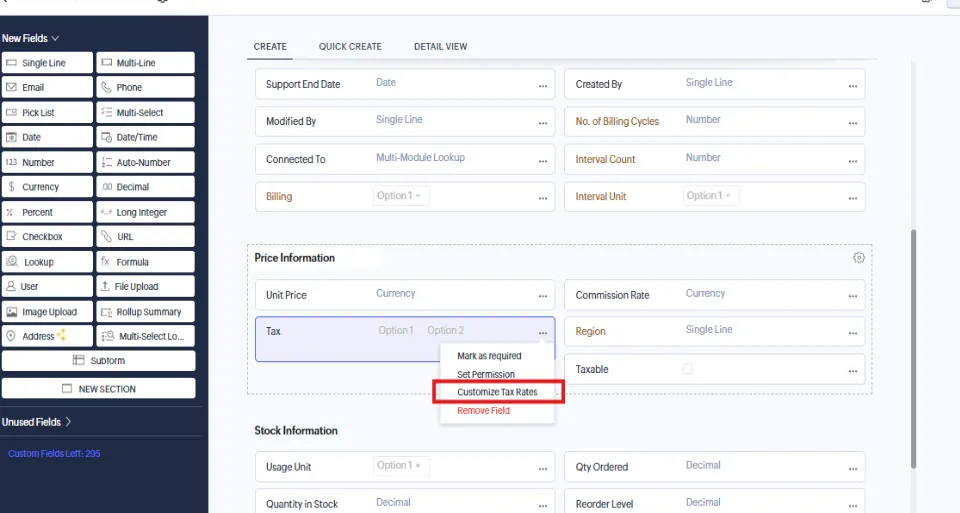
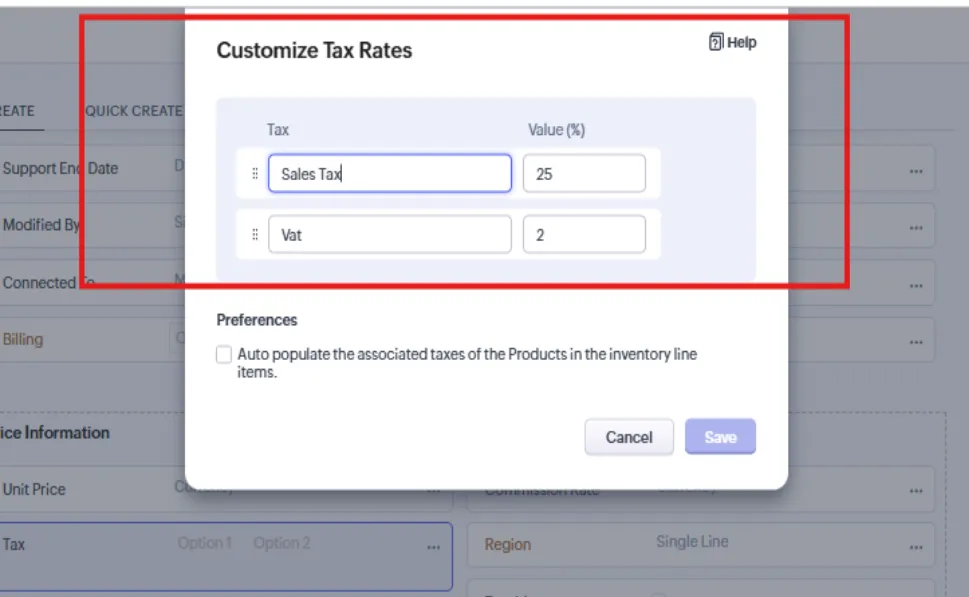
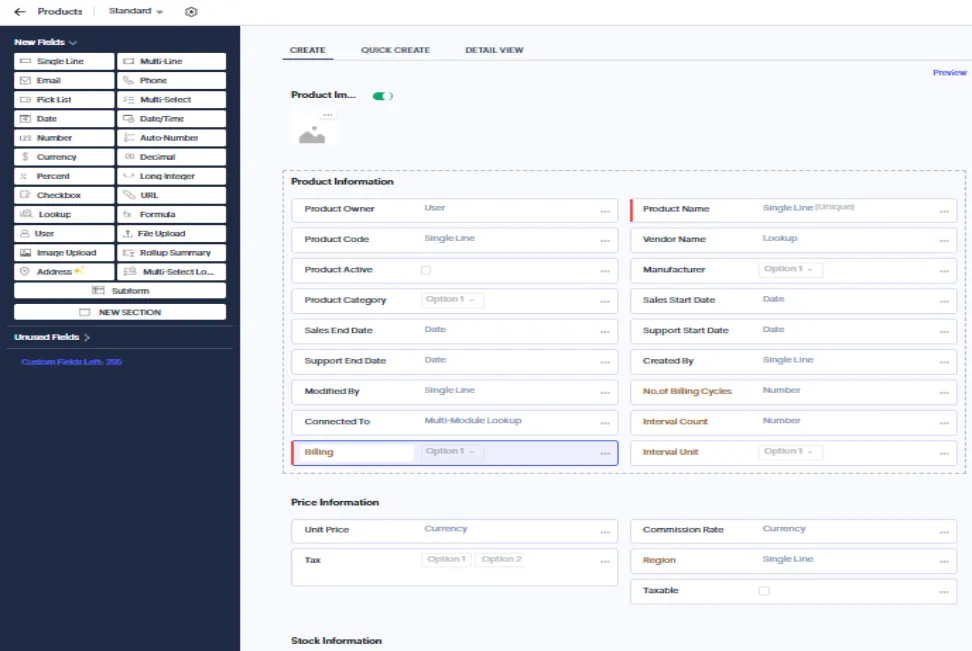
- On stock information give on Usage unit select quantity and give the qty ordered it will take as the product qty and Unit price was mandatory.
- By clicking Save the products will be created.
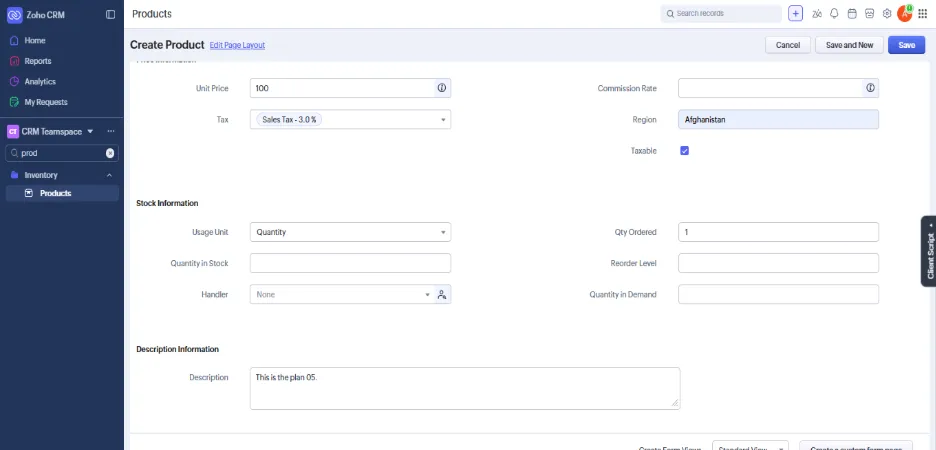
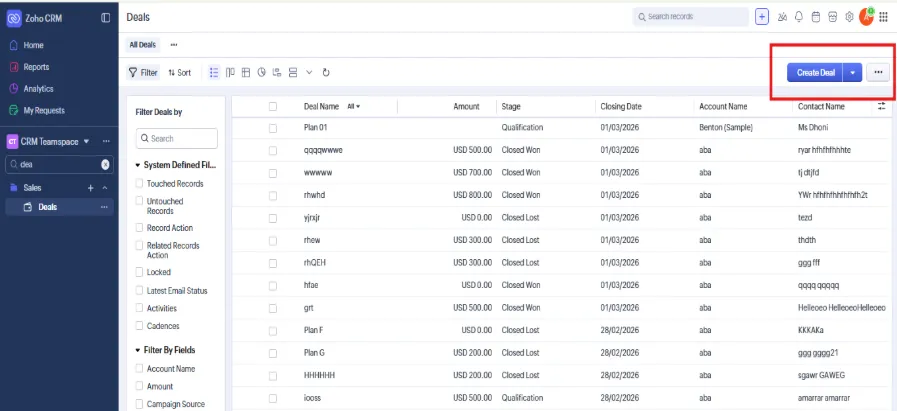
10.3 Create Deals on Zoho Sales CRM
- Create product on zoho sales crm by clicking create product
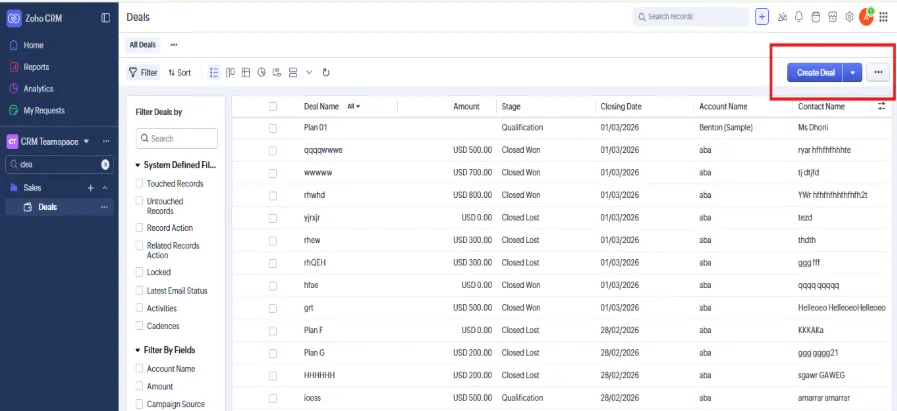
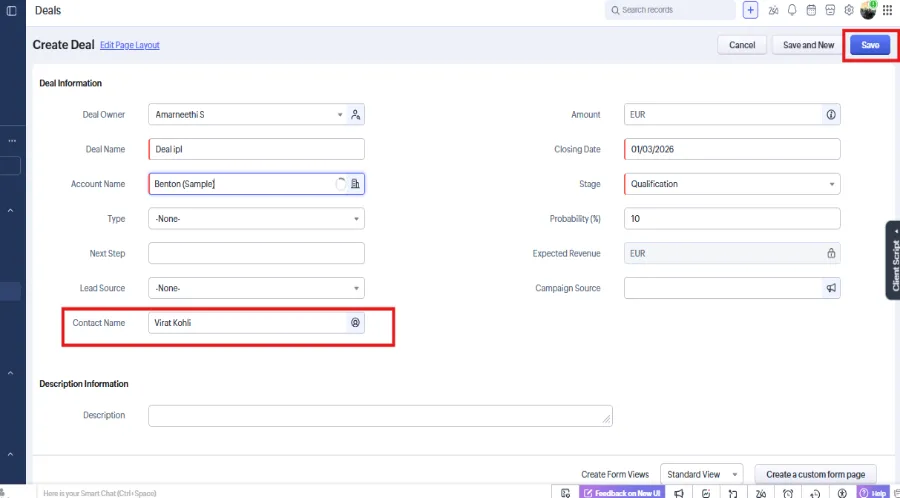
- Fill all the necessary details and add the customer which you created before.
- By clicking Save the deal will be created
10.4 On created deal add the products.
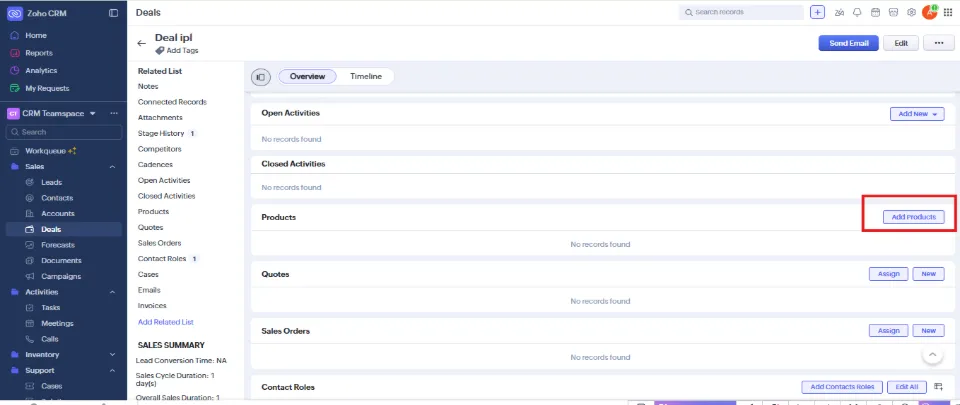
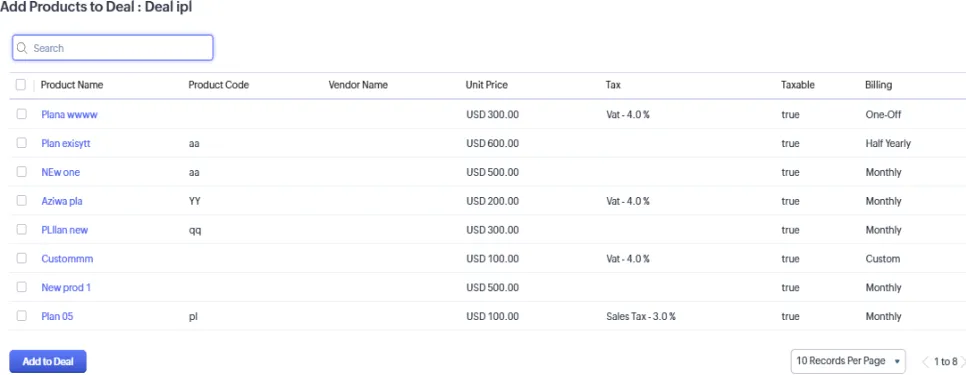
- By selecting the multiple products that will be added on deal.
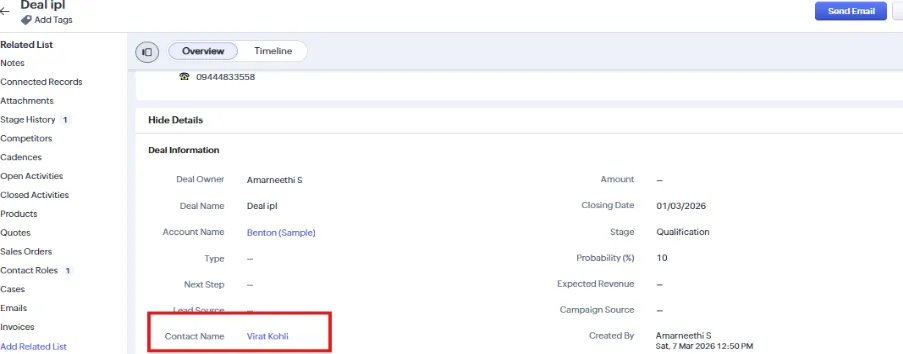
- You can edit and create the new customer here also and for one deal you have only one contact to have.
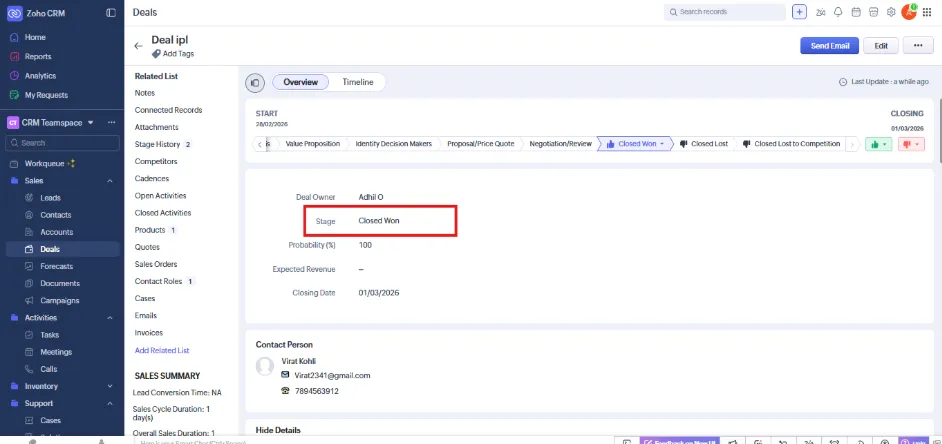
By changing the state qualification to closed won the product and contact will be synced to MYFUNDBOX.
10.5 Total Product amount field
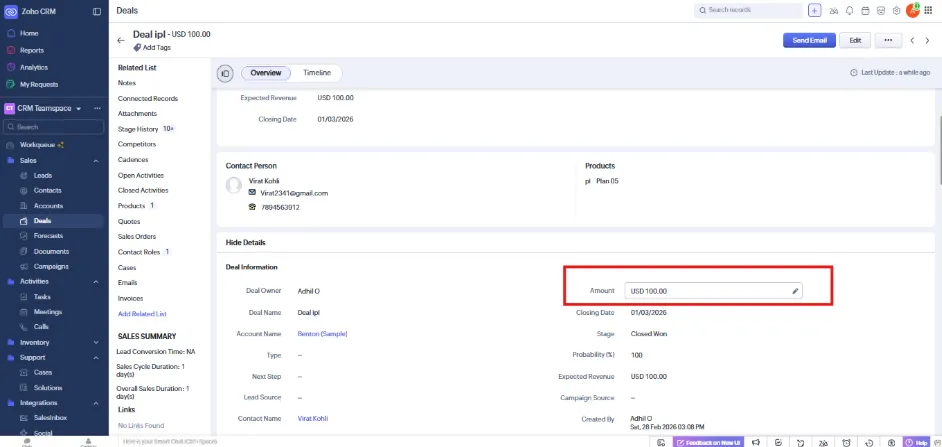
- When deal was closed won at first time then total products amount will be displayed on deal information amount field as dynamically.
Step 11: SYNC on MYFUNDBOX
- The product will be added as plan on MYFUNDBOX application.
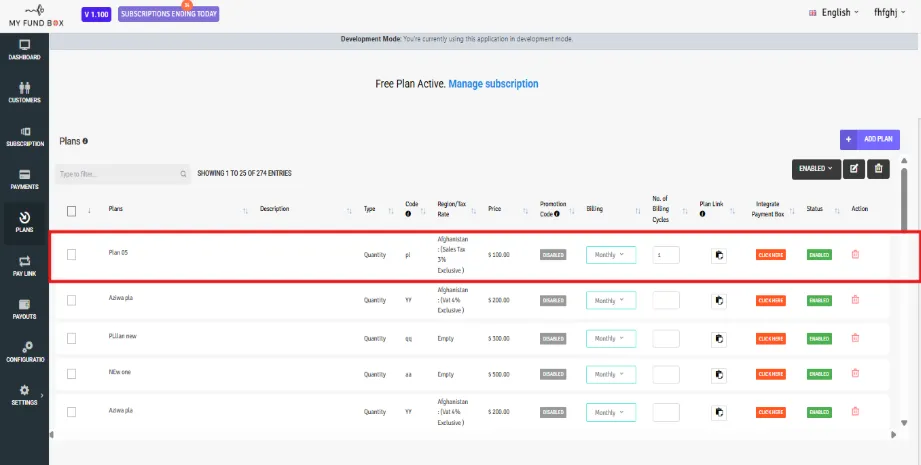
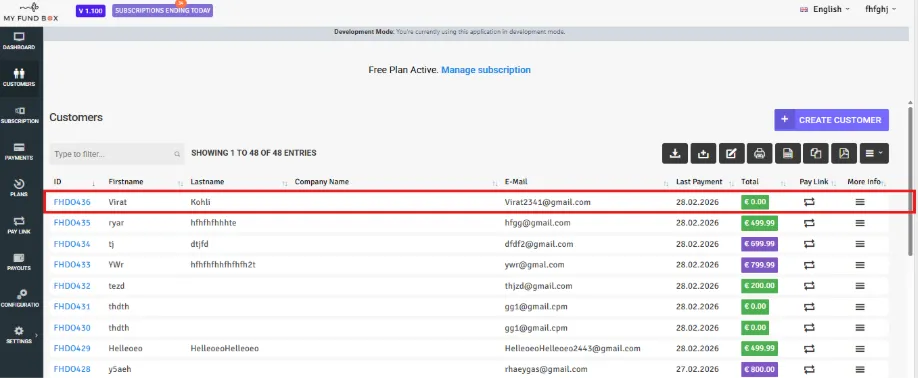
- The contact will be added as customer on MYFUNDBOX application.
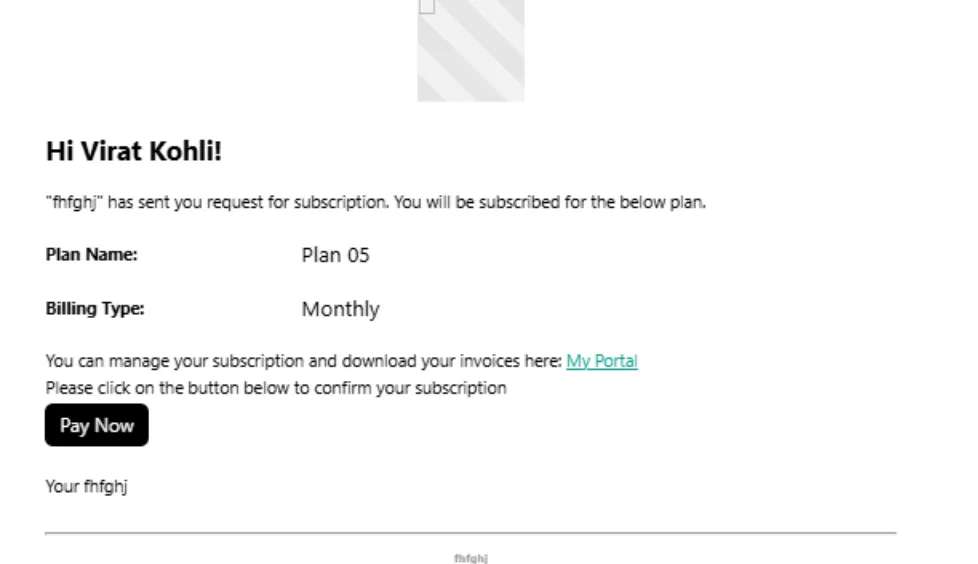
- And pay link will be received for that customer.
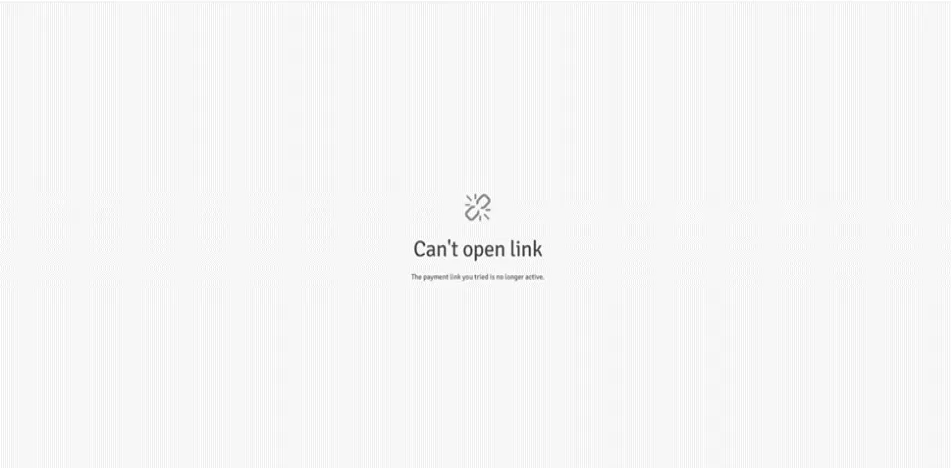
- Before any payment, stage is changed to closed lost then pay link will be restricted
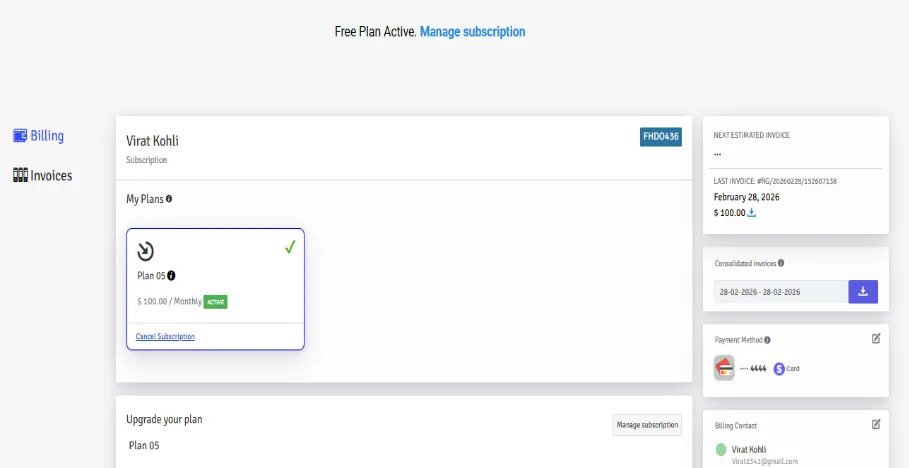
- Otherwise then the payment was successfull for that subscription recurring will be activated
- Then recurring going, if state was changed to closed lost it will be changed to active to cancel.recurring will be stoped.
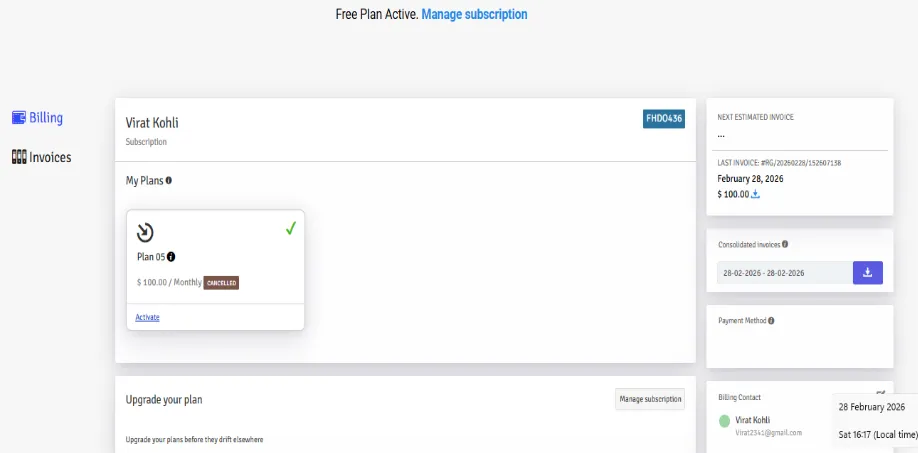
- The Subscription will be cancelled
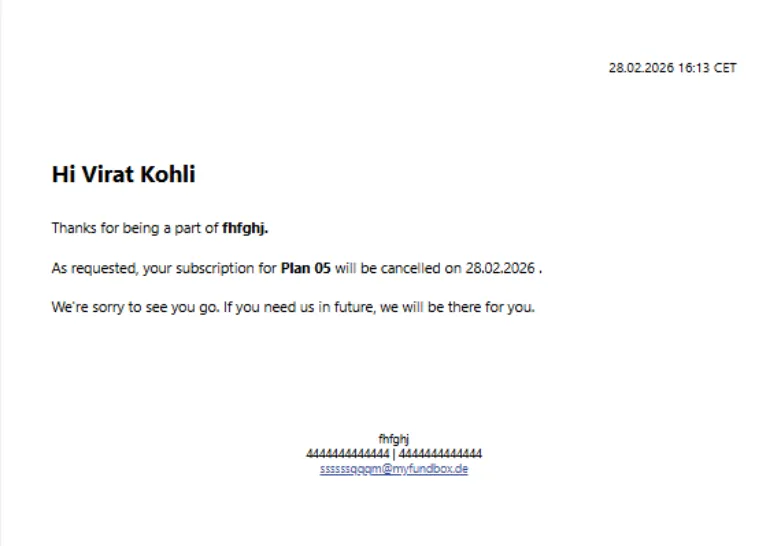
- The cancelled subscription will be sended as also as a email.
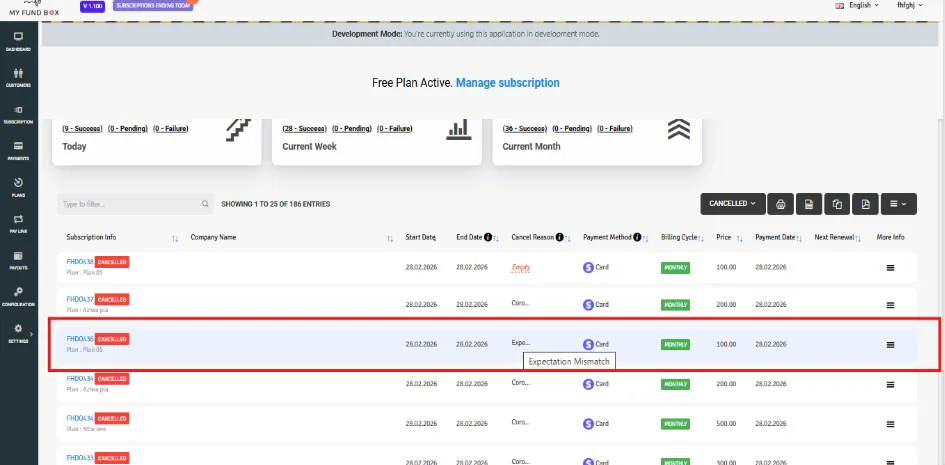
- The cancel reason will be displayed from zoho sales crm.
11.1 Re Activation from Zoho Sales CRM
- When state was again changed from closed lost to closed won the subscription will be reactivated.
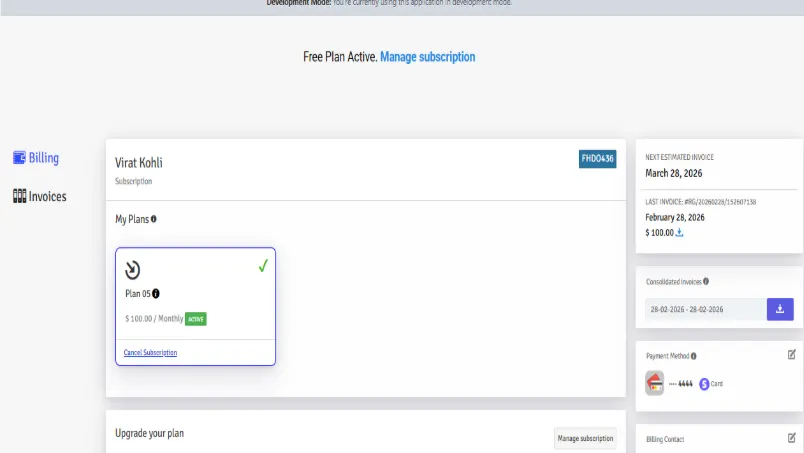
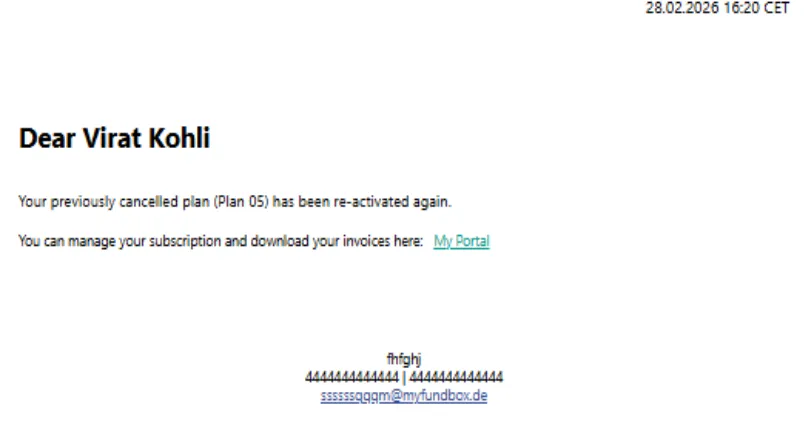
Reactivated mail will be sended.