HUBSPOT
INTRODUCTION
This document describes how User can create an Account in Hubspot software and get Keys and credentials to connect to MYFUNDBOX product.
Connect MYFUNDOX to Hubspot with credentials
Step 1: Create a HubSpot Account
Visit HubSpot Portal: 👉 HubSpot | Software & Tools for your Business
Click Log In.
If you do not have an account, click Sign Up or Create an account and complete the registration process.
Step 2: If already having an account, Sign In
Go to: 👉 https://app.hubspot.com/login
Enter your Email and Password and click Log In.
Step 3: Create an App
Click the Development module from the left sidebar (as shown in Figure 1.0).
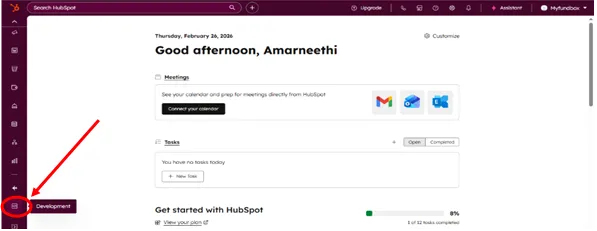
Fig 1.0
Click Legacy Apps & Click Create Legacy App. (as shown in Figure 1.1).
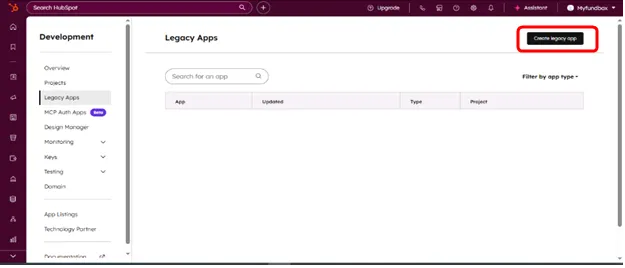
Fig 1.1
Choose Public App and click Create (as shown in Figure 1.2).
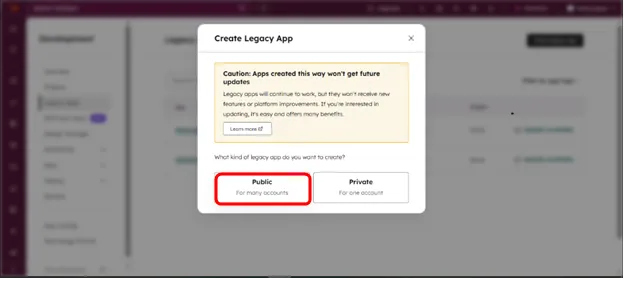
Fig 1.2
Create public app with Redirect URL & Scopes
- Enter App Name
- Click Auth module (as shown in Figure 1.3).
- Navigate to Redirect URIs, then add the following URIs (as shown in Figure 1.4) and Click the “Add New Scopes”(as shown in Figure 1.5) add the necessary scopes (as shown in Figure 1.6) click Create app
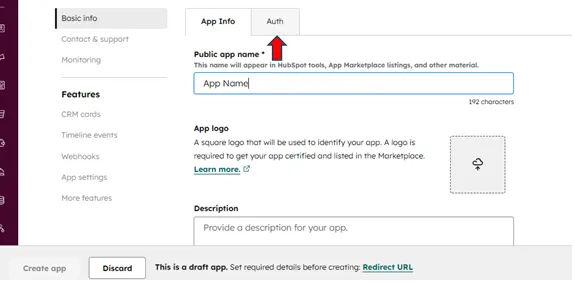
Fig 1.3
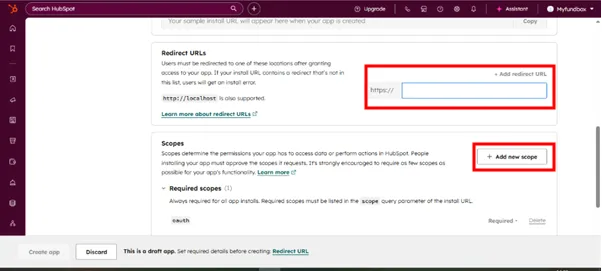
Fig 1.4
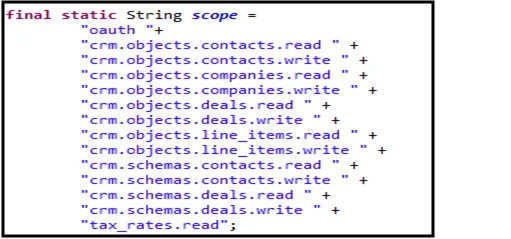
Fig 1.5
After adding this Scopes Click Create App, your app is ready
Step 4: Get the ClientId, Client secret and App Id
Sing in your hubspot Account
Navigate to Development > Legacy Apps > Your App > Auth (as shown in Figure 1.7)
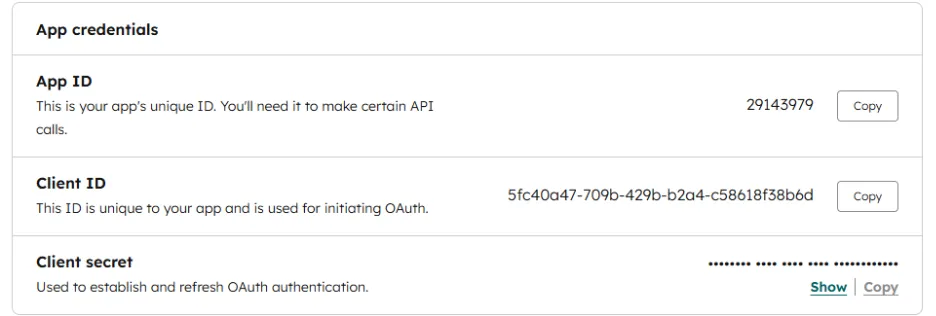
Fig 1.7
Step 5: Get the Api key
Sign in your hubspot Account
Navigate to Development > Keys > Developer API key
Click create key, it will create (as shown in Figure 1.7.1)
Get the api key from this module
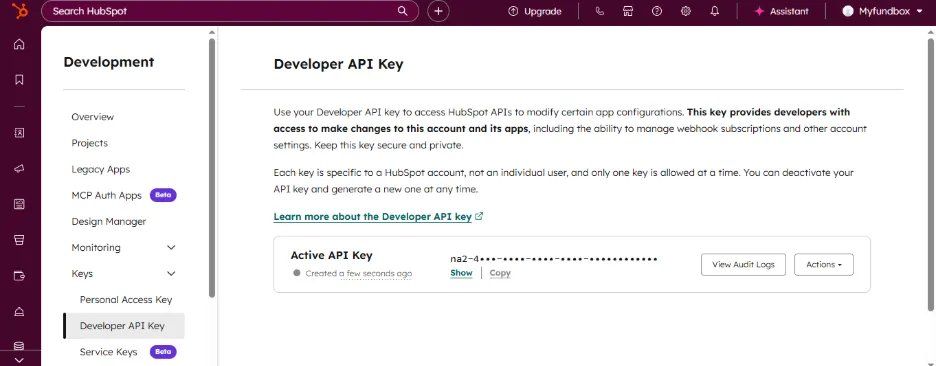
Fig 1.7.1
Now Client Id, Client Secret, App Id, API Key is Ready
Step 6: Connet MYFUNDBOX to Hubspot with credentials
Sign in to MYFUNDBOX Navigate to Configuration > Integration > Sales Crm > Hubspot (as shown in Figure 1.8)
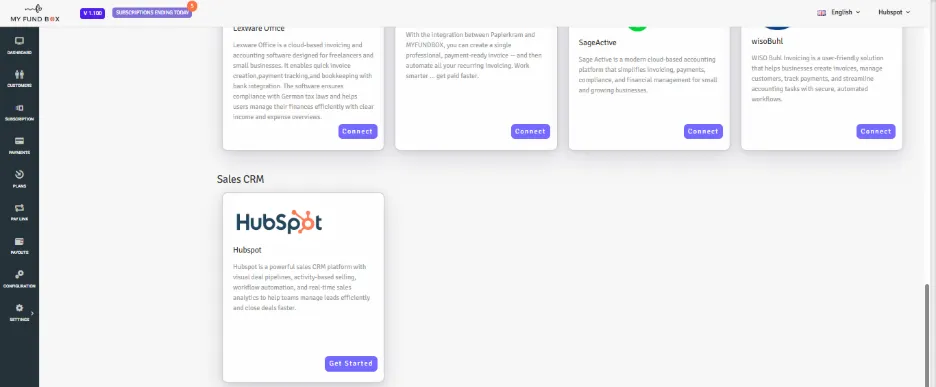
Fig 1.8
Click get Started and it will navigate like (as shown in Figure 1.9)
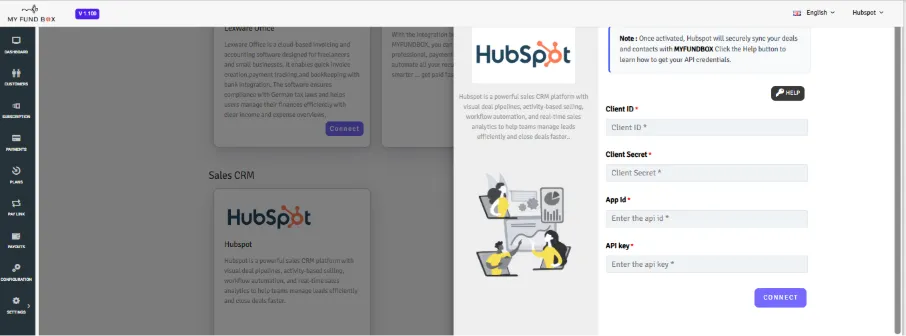
Fig 1.9
- Give the Client Id, Client Secret, App Id, Api Key
- Click Connect
- Navigate to Hubspot Authenticate page (as shown in Figure 2)
Choose Your Account
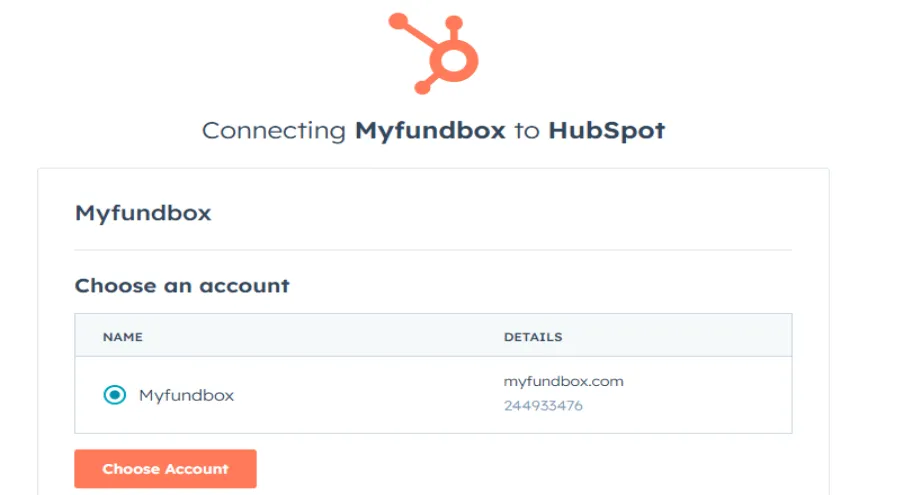
Fig 2
- It will navigate to Authentiaction accses page (as shown in Figure 2.1)
- Tick the checkbox and Click Connect app
It will connect and redirect to myfubdox integration page(as shown in Figure 2.2)
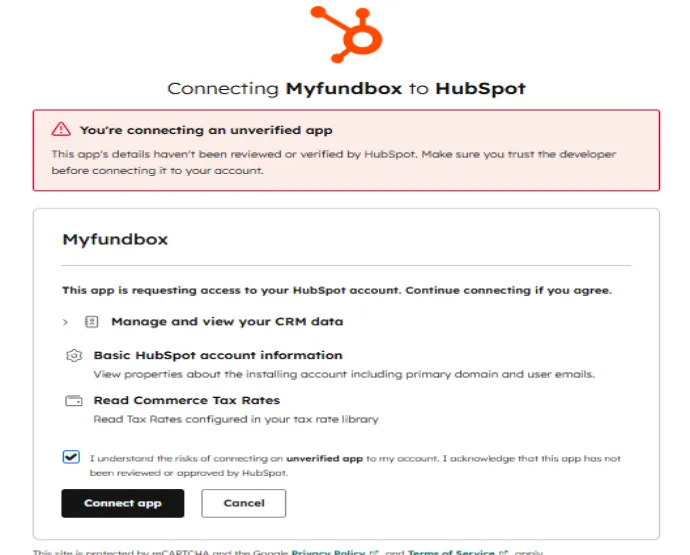
Fig 2.1
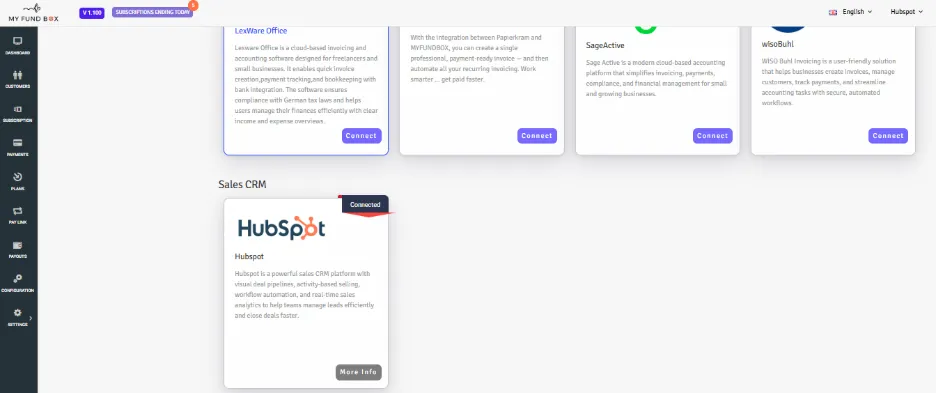
Fig 2.2
Manage Configuration
- Enable/Disable Hubspot
- Delete Hubspot
Enable/Disable Hubspot
Sign in to MYFUNDBOX Navigate to Configuration > Integration > Sales Crm > Hubspot (as shown in Figure 2.3)
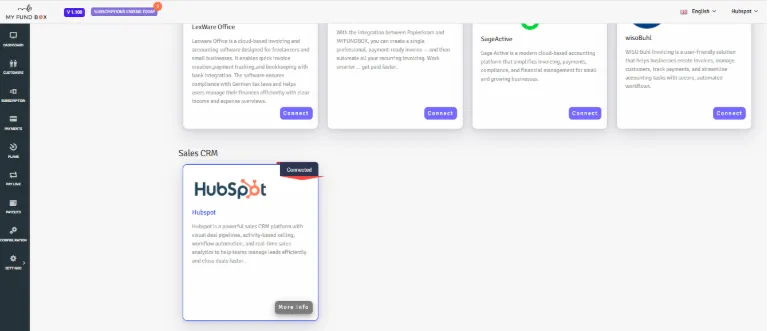
Fig 2.3
Click the More Info > Configuration tab (as shown in Figure 2.4)
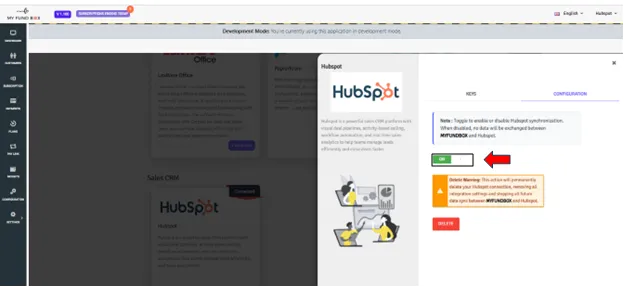
Fig 2.4
Delete Hubspot
Click the More Info > Configuration tab (as shown in Figure 2.5)
Click Delete and click Yes Delete for delete this connection (as shown in Figure 2.6)
Your Hubspot connection as been deleted (as shown in Figure 2.7)
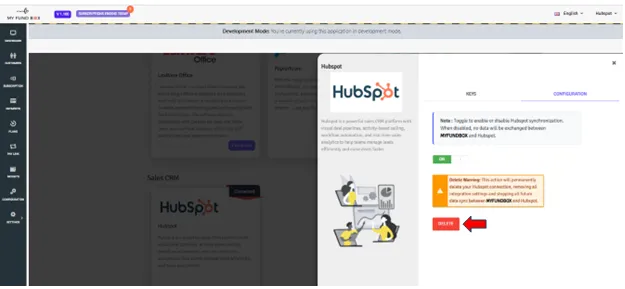
Fig 2.5
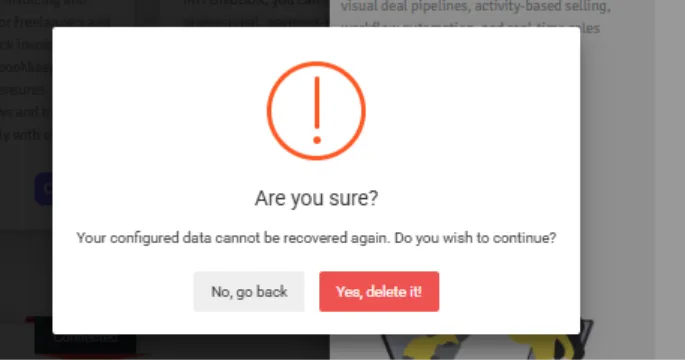
Fig 2.6
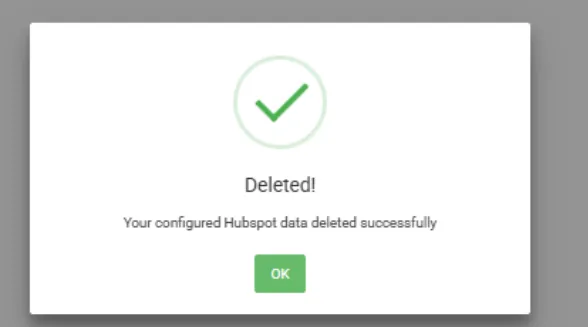
Fig 2.7
Manage Hubspot Details
- Contact
- Line item
- Deal
Contact
How to create a contact
Step 1:
Go to Home > CRM > Contacts > Add New > Create New
Step 2:
Give the details as name and email is “Madatory feilds”, Address feilds is optional (as shown in Figure 3)
Step 3:
Click Create your contact as been created (as shown in Figure 3.1)
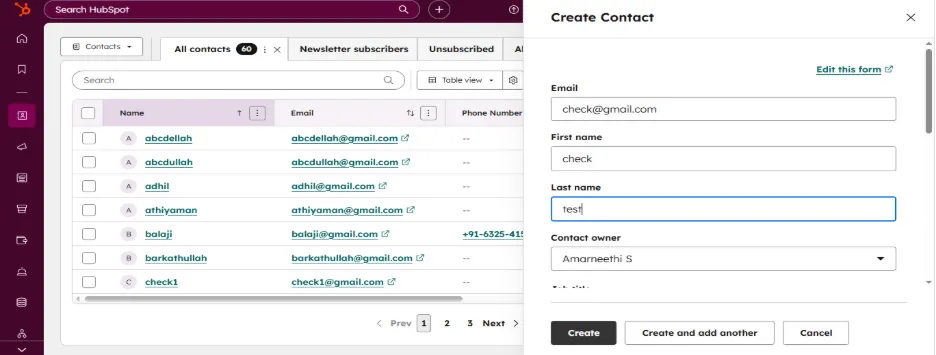
Fig 3
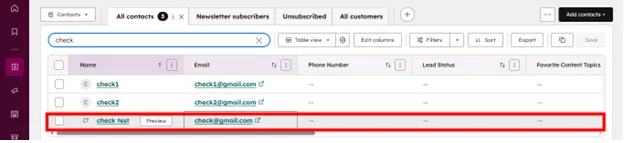
Fig 3.1
Line Item
How to create a line item
Step 1:
Go to Home > Commerce> products> Add product> Create product
Step 2:
Enter the required details — Name and Amount are mandatory fields, All other fields are optional. Since no billing details were provided, the system will automatically select the default option, which is One-Time (as shown in Figure 4, 4.1)
Step 3:
Click create your product is created
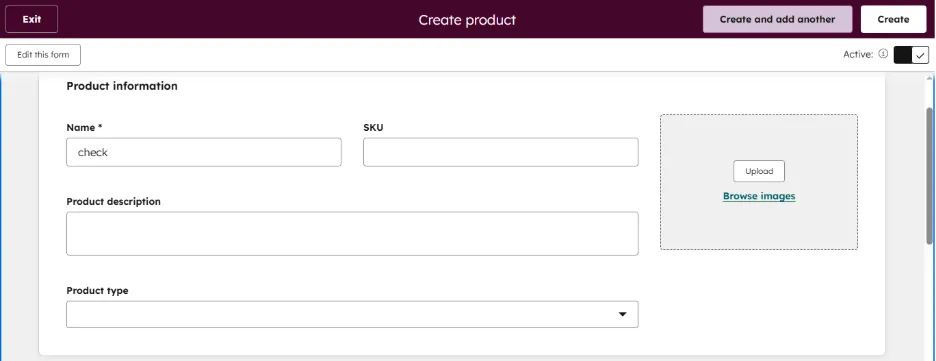
Fig 4
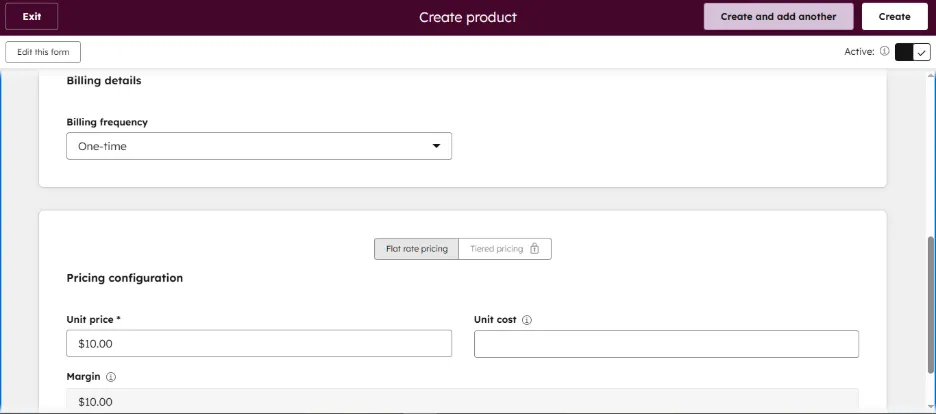
Fig 3.1
Deal
How to create a deal along with contacts and line items
Step 1:
Go to Home > CRM > Deals > Add deals > Create New
Step 2:
Enter the required details — Name (as shown in Figure 5)
Step 3:
Scroll the end of the form
Step 4:
Add the Contact in Contact feild (as showm in Figure 5.1)
Step 5:
Add the Product in Line item feild (as showm in Figure 5.2)
Step 6:
Click producr it will added
Step 7:
Click create the deal as been created (as showm in Figure 5.3)
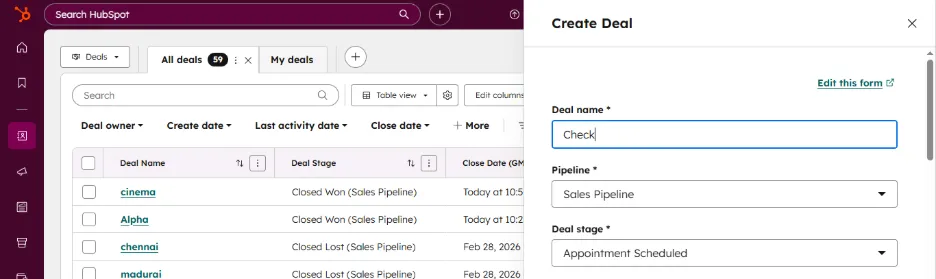
Fig 5
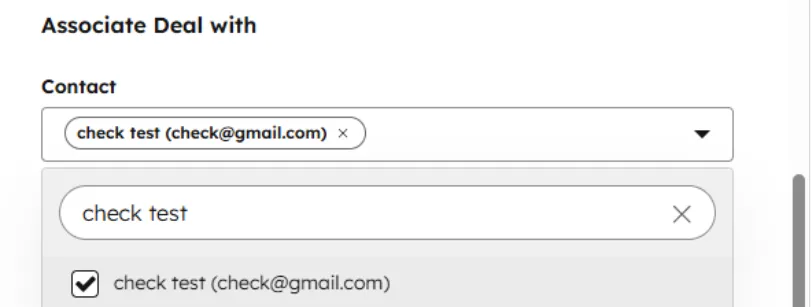
Fig 5.1
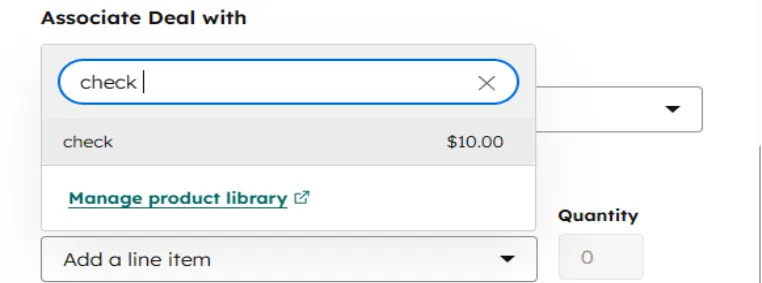
Fig 5.2
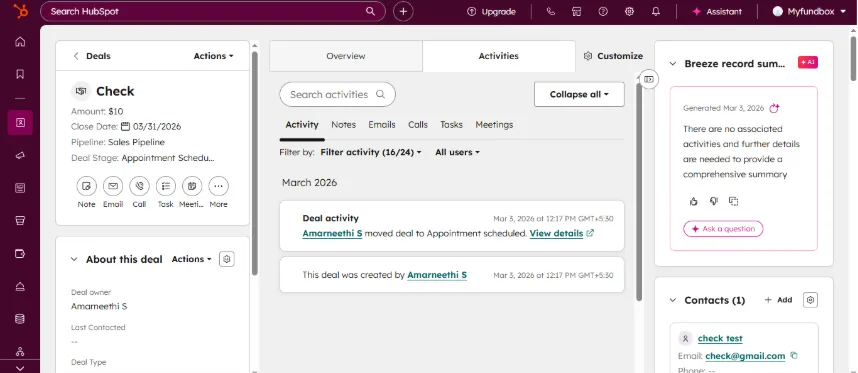
Fig 5.3
HubSpot → MYFUNDBOX Sync Instructions
Trigger Condition
The integration is event-based.
Primary Trigger:
- Deal stage changes to Closed Won
Non-Trigger Stages:
- All other deal stages must not initiate sync.
Pre-Sync Validation Rules
Before processing a Closed Won deal, the following validations must pass:
- Deal must have exactly one associated Contact
- Deal must have at least one Line Item
- Multiple Line Items are allowed
- If any validation fails → Do not process the deal
Sync Actions (Closed Won)
When validation passes:
- Sync Deal details
- Sync associated Contact details
- Sync all Line Items
- Create or update subscription in MYFUNDBOX
- Generate and send Paylink to customer
Reverse Status Handling
Closed Won → Closed Lost
Action: Cancel the related subscription in MYFUNDBOX
Closed Lost → Closed Won
Action:
- Reactivate existing subscription
- Send reactivation email
- Include login link in email
Post-Connection Rule
- Deals marked Closed Won before integration connection must not sync.
- Only deals changed to Closed Won after connection activation should trigger sync.