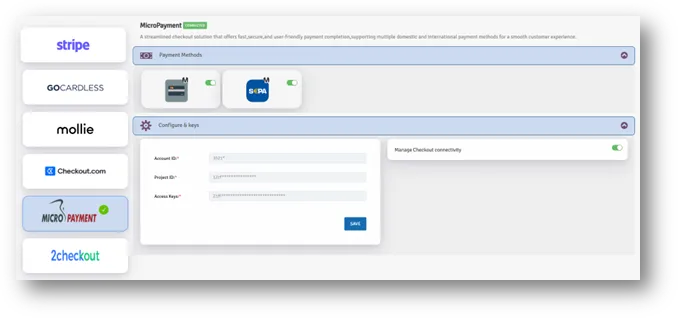
MICRO PAYMENT GATE WAY
CONFIGURATION / USER GUIDE
Step 1: Create a Micropayment Account
- Visit the Micropayment website - https://web.micropayment.de/en/
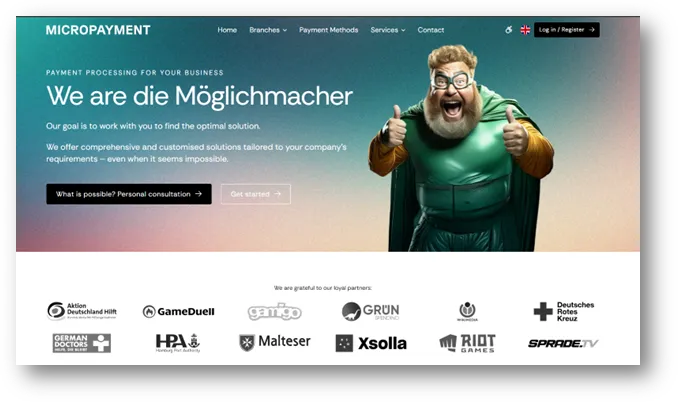
- Click Sign Up
- Complete business registration and verification.
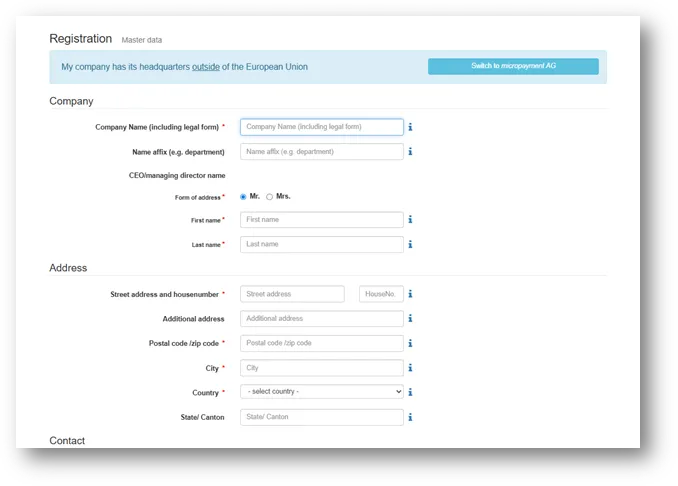
- Once approved, log in to the Micropayment Merchant Portal.
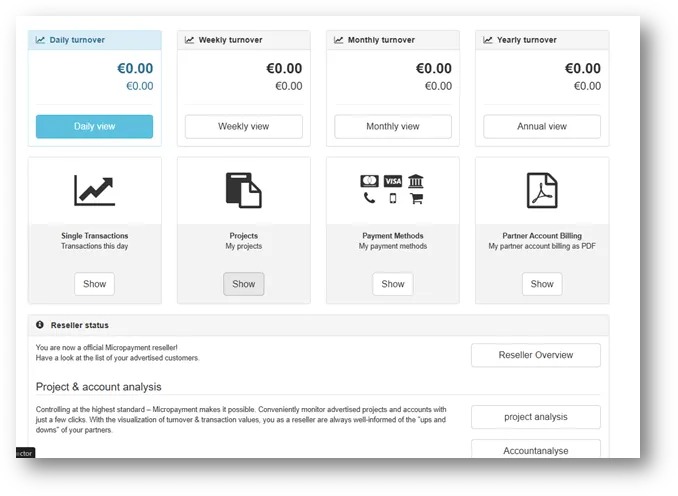
Note : Account approval is required before live transactions can be processed.
Step 2: Create a Project
- Log in to the Micropayment Merchant Portal.
- Navigate to Projects / Accounts.
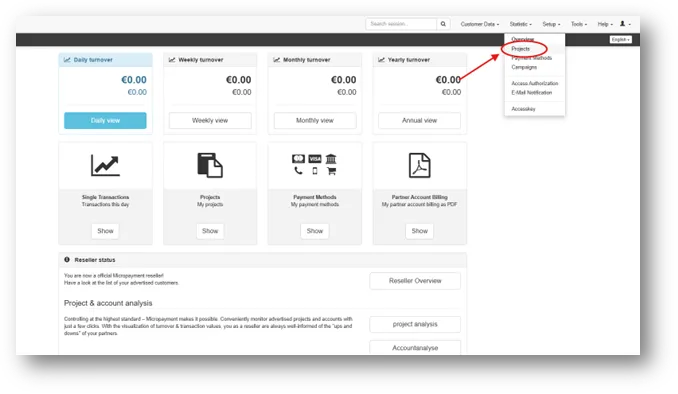
- Click Create New Project
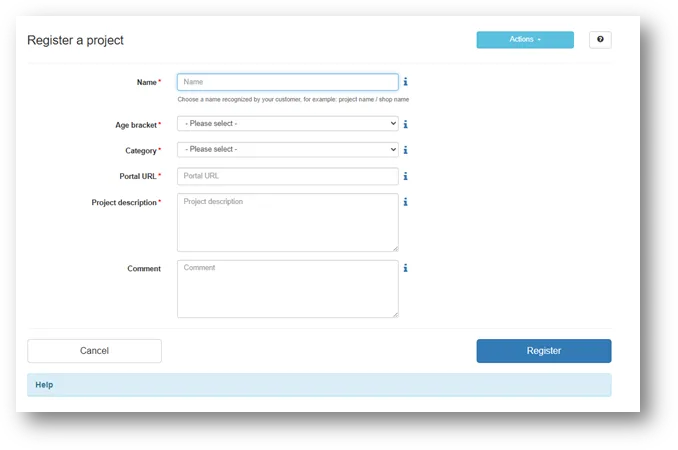
- Enter the required project details:
- Save the project.
Once the project is successfully created, the project will be available for payment method configuration.
Step 3: Configure Card Payment Method
Micropayment provides two Credit Card configurations for each project.Both configurations must be enabled for Credit Card payments to work correctly.
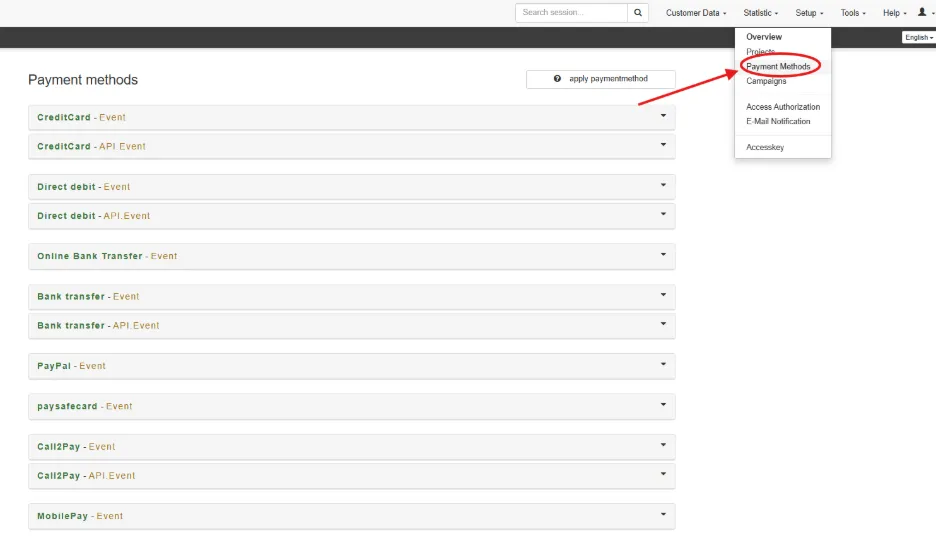
- Credit Card – Event
- Go to the Payment Methods tab in the Micropayment Merchant Portal.
- Locate Credit Card – Event for your project and click Edit.
- Ensure the following statuses are correct:
- Project status: Enabled
- Live mode: Activated
- Enable the checkbox Activate payment method for your project.
- Notification URL Configuration
- In the Notification URL field, enter the following URL:
https://fcrm.myfundbox.com/ResponseNew.jsf
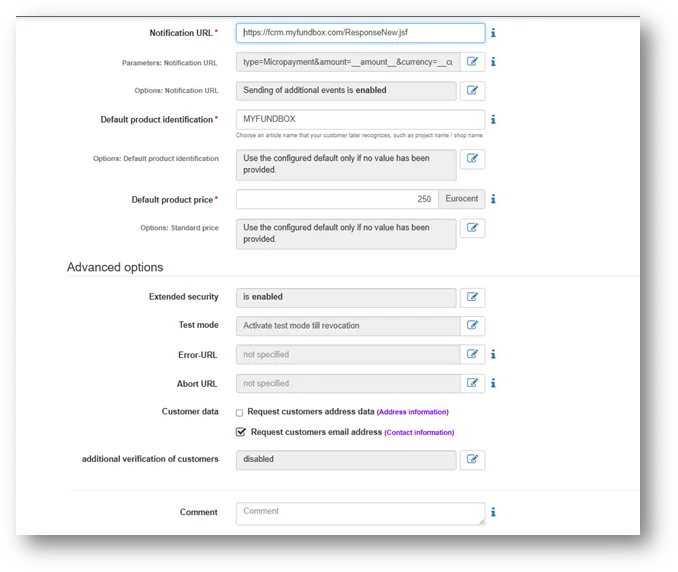
- Configure Notification URL Parameters
- Click Parameters: Notification URL
- Go to the Configuration tab
- Add the following custom parameters:
Parameter Name | Placeholder Value |
|---|---|
mytrId | __$my-tr-id__ |
payupdate | __$pay-update__ |
type | Micropayment |
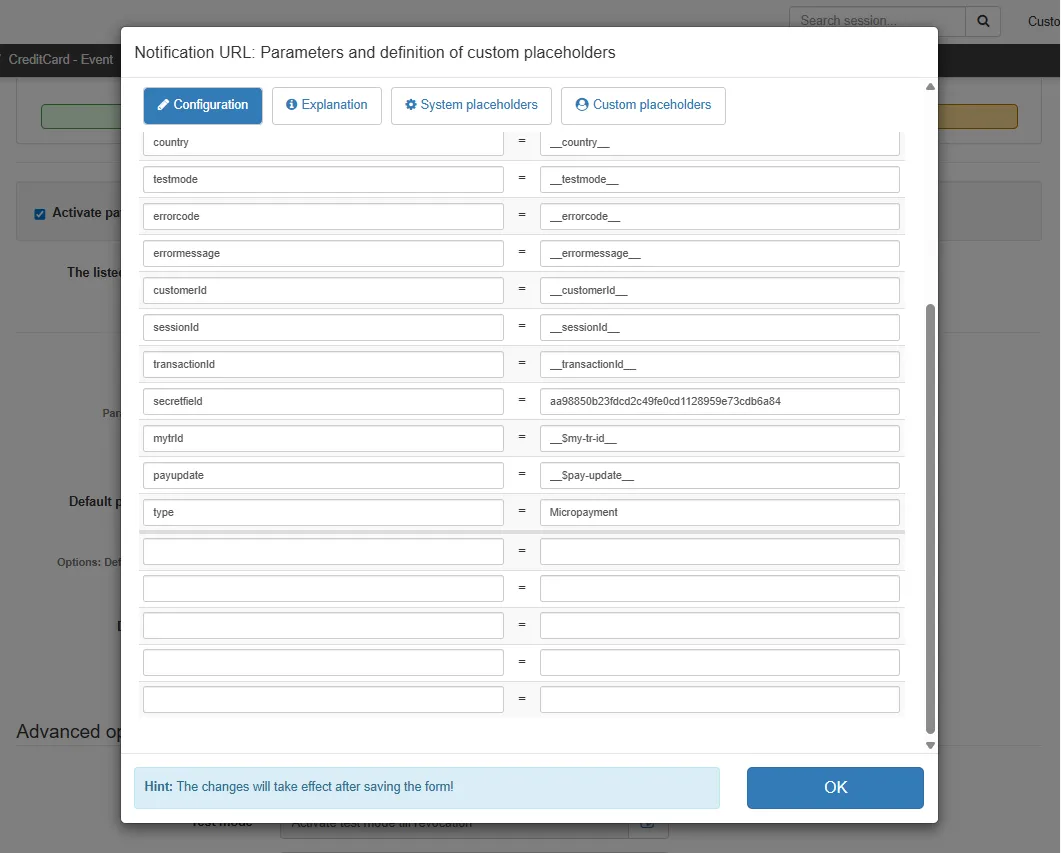
- These parameters will be sent in the server-to-server notification for payment tracking and update handling.
- Default Product Settings
- Default product identification : Enter a recognizable product name (for example: MYFUNDBOX).
- Default product price : Enter the default price in eurocents (for example: 250).
- Leave the default options enabled if values are provided dynamically during payment creation.
- Click Save settings.
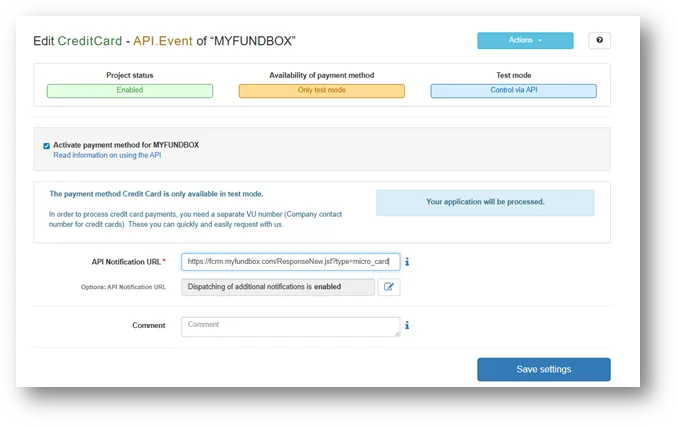
- Credit Card – API.Event
- Go back to Payment Methods.
- Find CreditCard – API.Event and click Edit.
- Enable Activate payment method for MYFUNDBOX.
- API Notification URL : https://fcrm.myfundbox.com/ResponseNew.jsf?type=micro_card
- Ensure Dispatching of additional notifications is enabled.
- Click Save settings.
Step 4: Copy Micropayment Keys
To connect Micropayment with the application, two values are required:
- Project ID
- Access Key
Follow the steps below to locate each value in the Micropayment portal.
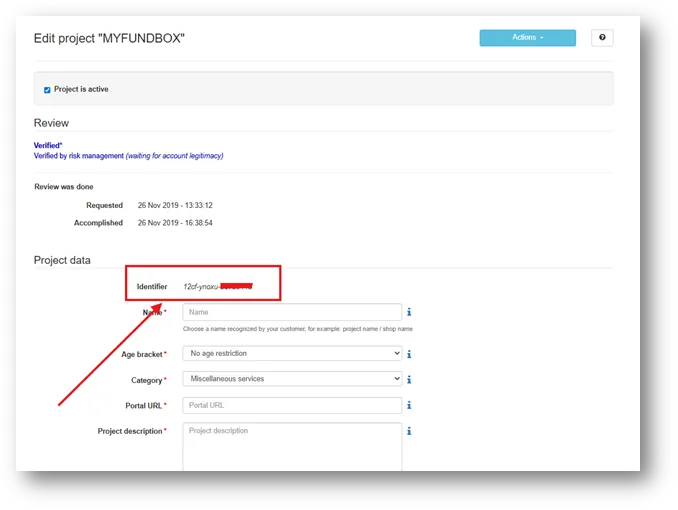
- Locate Project ID
From the Micropayment portal:
- Go to Setup
- Click Projects
- Open the required project
- The Project ID is displayed in the project details.
- Copy the Project ID.
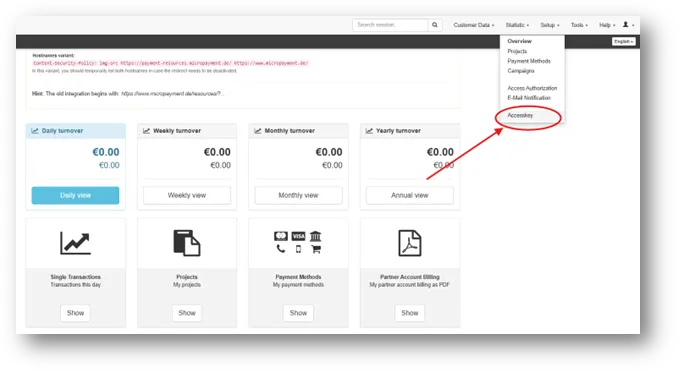
- From the Micropayment portal:
- Go to Access Keys
- Open the Access Key section
- Copy the required Access Key
This key is used to authorize the connection between Micropayment and the application.
Step 5: Connect Micropayment in MYFUNDBOX
- After copying the required keys from the Micropayment portal, connect Micropayment to MYFUNDBOX.
- Log in to the MYFUNDBOX website.
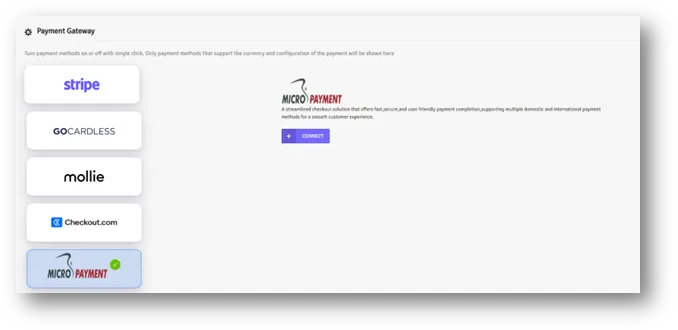
- Navigate to Settings → Payment Gateways.
- Click on Micropayment.
- Click Connect.
- A configuration window will appear with the following fields:
- Project ID
- Access Key
- Paste the corresponding values copied from the Micropayment portal into each field.
- Click Save.
- Micropayment is successfully connected to MYFUNDBOX.
- The payment gateway connection is complete.
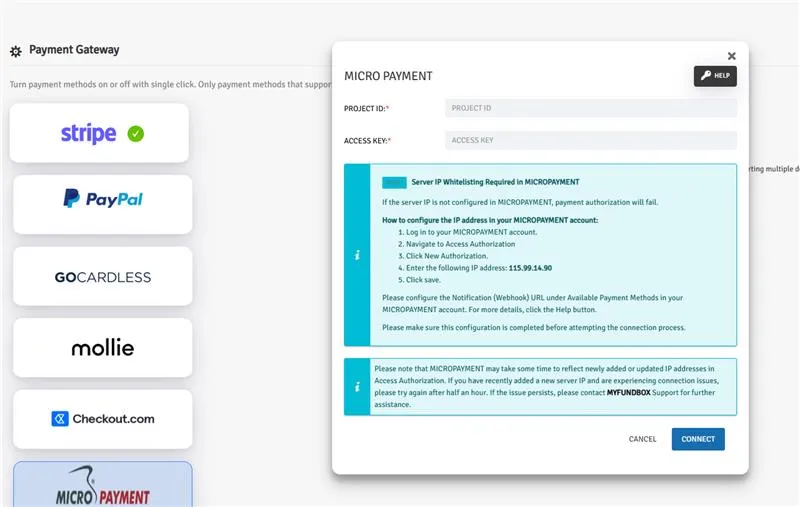
Once connected, the MicroPayment tile displays a green connected badge, confirming the integration is active and ready to use.